Tuesday, February 26, 2013

No Knead Bread


I swore I wouldn't be one of those women who, once they give birth, post about their children or the demands of motherhood on what was once a food blog. But that was before. That was before I became a mother. That was before I knew what a miracle it could be to care for an infant and get something into the oven and then back out of the oven at the appropriate time. That was before I found myself hunt-and-peck typing with one hand while the other kept a sleeping six-week old from sliding off my lap. Yeah, that was before. So, file this one under "things you can bake when your newborn won't let you put him down for more than ten minutes at a stretch". 

I started baking no knead bread when A. was four weeks old. I started baking it because one, I was no longer able to pick up staffed loaves of Red Hen bread from work and two, I had to do something in the kitchen. No knead bread is the perfect postpartum bake for several reasons. First of all, it makes you feel like you've accomplished something in the otherwise endless cycle of breast feeding and diaper changing. You might not have showered or had a chance to make the bed, but you baked bread! Two, it is incredibly forgiving. The initial fermentation time can vary from 12 to 18 hours and I've stretched it to over 20 with no harm done. And if your loaf has gone over its two hour rising time before you could preheat the pot in the oven, punch it down, reform it and let it rise again. Your bread might be a little denser than usual, but it will not be ruined. Thirdly, the active cooking time, which is spread over two days, is minimal. Mixing the dough: three minutes; turning the dough out to rest: one minute; forming the loaf and setting it to rise: two minutes tops. Then there's just the thirty seconds to plop the loaf in the pot and get it in the oven and thirty minutes later another half minute to remove the lid. Finally, twenty minutes later you'll have to spend maybe, on the outside, an entire sixty seconds removing the pot from the oven and the beautiful finished loaf from the pot. That makes fewer than ten minutes of active cooking time and even the neediest babe has enough patience for that. 

The original recipe calls simply for unbleached white bread flour. I've been using two thirds white bread flour and one third whole wheat bread flour and I think I like it better. I see no reason not to experiment with some rye flour, or possibly adding walnuts. Today I used high gluten flour and made my prettiest loaf to date. I am happy to report that it tastes as good as it looks. It has the tangy sourdough quality this bread always does, a nice crust and a springy, moist interior. I'm guessing here--I'm no food scientist--but I think the high gluten flour helped the loaf maintain its structure through the rise and pot plop better than regular bread flour. In any event, this is a tasty, hassle free bread recipe for those with or without the time for a good, long knead.

No Knead Bread

Adapted from Jim Lahey's recipe

  • 2 cups bread flour
  • 1 cup whole wheat bread flour
  • 1 1/4 tsp. salt
  • 1/4 tsp. instant yeast
  • 1 5/8 cups water
  • Mix together the flours, salt, and yeast. Add water and stir until well combined. The mixture will be much looser than most bread doughs. Cover mixture with plastic wrap and leave in a warm (70°F or so) place for 12-18 hours, preferably closer to 18.
  • After 12-18 hours, the surface of the dough should be covered in bubbles. Flour a work surface and turn the dough out. Coat your hands with flour and fold the dough over itself a few times. Cover with the plastic wrap and leave for 15 minutes.
  • Coat a cotton towel generously with flour. Using enough flour so the dough doesn't stick to anything, form it into a ball and place seam side down on the towel. Dust the top with more flour and cover with another towel. Leave to rise for 1 1/2 to 2 hours, or until when the loaf is poked it doesn't bounce back too quickly.
  • Place a large cast iron pot (6-8 quart) with its lid in the oven. Preaheat oven and pot to 450°F about half an hour before the rise time is up. Uncover the loaf and using the bottom towel to support it, plop it into the pot. Now it will be seam side up. If necessary give the pot a shake to better position the dough, but don't get carried away. Place the lid over the pot and bake for 30 minutes. After 30 minutes remove the lid and bake an additional 15-20 minutes, until nicely browned. Remove from pot and allow to cool on a rack. Once cool, remove excess flour with a brush.

Wednesday, February 13, 2013

Granola


A few days ago, my friend E.R.V.B posted the recipe for her favorite granola on Facebook. She got the recipe from a friend who found it in some cookbook or other. I figured only good recipes make the rounds like that and if E.'s sense of taste is even half as good as her sense of style, this granola had to be worth making. Also, my favorite local organic granola is over nine dollars a pound and, if I calculated correctly, the ingredients for my organic granola came in at just a little over three bucks a pound.

I made my first batch of E.'s granola today, with only a few minor modifications. I followed her lead and used maple syrup instead of honey, but chose to use coconut oil instead of canola and to omit the brown sugar altogether. I also added half a cup of unsweetened shredded coconut. The recipe leaves the choice of nuts, seeds, and fruit up to the cook. I used almonds, pumpkin seeds, and sunflower seeds, raisins, and unsulphured dried apricots cut into pieces. I like this combo, but for variety's sake I'll probably change it up in the next batch--add some cashews maybe, or perhaps some dried blueberries.

Granola

From a friend of a friend

  • 3 cups rolled oats
  • 2 cups nuts and/or seeds of choice
  • 1/2 cup unsweetened shredded coconut
  • 1/2 tsp. salt
  • 1/2 cup coconut oil, melted
  • 1/2 cup maple syrup
  • 1 tsp. vanilla
  • 1 cup dried fruit of choice
  • Preheat oven to 325°F. Line baking sheet(s) with parchment paper and set aside.
  • In a large bowl, combine the dry ingredients, except the fruit, and set aside. In another bowl combine oil, syrup, and vanilla. Add wet ingredients to dry ingredients and mix until the oats etc. are evenly and well coated. Turn mixture out onto baking sheet(s), making a not-too-thick even layer.
  • Bake 30 minutes, stirring two to three times during the cooking time, and adding the dried fruit half way through. Remove from oven when browned to your taste. Allow to cool thoroughly (you can stir it from time to time to encourage cooling) before storing in an airtight container.
E. is right: this granola is delicious. Delicious, easy, and cost effective...it doesn't get better than that.


Monday, January 30, 2012

Eggs

The chicken? The egg? The cardboard box. That's what came first in my chicken adventure. Our fifty meat birds and twenty-five layers were sent through the United States Postal Service in two ventilated cardboard boxes strapped one on top of the other. The package was chirping as T. brought it out from the back and it chirped all the way home, stopping at sudden movements or loud noises only to resume seconds later.
It has been seven months since we gave those chirping little balls of fuzz their first drink of water and first taste of mash. Now they're giving us eggs. We gave away half our birds and from the ten we kept we get up to ten eggs a day--some light brown, some pink, some speckled, dark brown ones from black bird, and blue ones from yellow bird.
I have heard it said that all eggs taste the same. Organic eggs, 'conventional' eggs, free range, cooped up, store bought, back yard--they all taste the same. But I don't buy it. Perhaps I'm biased, influenced emotionally by my involvement in the production of these eggs, but I really do think these are better than what you can buy at the grocery store. The yolks are more golden and stand up taller in the pan. The whites have a more delicate texture, refusing, happily, to become rubbery. I., my best customer and one not prone to exaggeration or overt praise, called our eggs the best she has ever had and said they poach better than any egg she has ever cooked. So there.
Another benefit of keeping your own layers is that the anomalies don't get weeded out. Several times a month one of the girls lays a veritable torpedo of an egg. It's a double-plus-super-double-yolker. Two eggs in one, more like.
I had started to wonder if fresh eggs were worth the feeding and watering and cleaning of poopy boxes and worry over hen pecking and everything else that comes with keeping chooks. Having tasted tages ei, I now know they are.

Friday, July 8, 2011

Rooibos-Anise Hyssop Sun Tea

It's always nice when delicious things practically make themselves. Sun tea is one of those things. You can put it out to steep in the morning and forget about it most of the day and then when you're in need of a refreshing beverage (because if it's hot enough to make sun tea, it's hot enough to drink a cool glass of something) your tea is ready to be strained and poured over ice.
Rooibos is a wonderful base for sun tea. It gives it a beautiful color and a rich, round flavor from which to build. It readily welcomes other flavors, such as the anise hyssop I used, which gave it a refreshing hint of licorice. I used anise hyssop, because that's what I have, but any of the mints--peppermint, spearmint, chocolate mint, pineapple mint, lemon balm--would work just as well. As always, use what you have, trust your own judgement, and don't panic--it's only tea.

Rooibos-Anise Hyssop Sun Tea

for one half gallon

  • 4-5 Tbs. rooibos tea
  • several sprigs anise hyssop
  • a half-gallon jar with lid
  • cold water
  • Spoon tea into half-gallon jar. Pick anise hyssop, bruise the leaves by rolling them between your palms, and place in jar. Fill the jar with water and screw on the lid. Place jar outside in a sunny spot that will remain so for several hours. Allow to steep 3-5 hours. Strain into a pitcher and serve over ice. Garnish with a sprig of anise hyssop. Store any leftover tea in the refrigerator.

Thursday, June 30, 2011

Strawberry Jam

I couldn’t let June go by, let all the strawberries ripen, without making at least one batch of strawberry jam. So yesterday I did. It’s not the strawberry-jalapeno jam a customer told me about Tuesday night; it’s not the balsamic strawberry jam I saw in a cookbook at the library on Monday; it’s just plain old strawberry jam made from the recipe in the Sure-Jell box. It’s the kind of strawberry jam you’re happy to take out of the pantry and spread on toast when the snow has long since covered the garden.
Strawberries are on the very, very low end of the pectin spectrum, so as much as I like the idea of just using fruit and sugar and maybe some lemon juice, my fear of the jam not setting is greater. To allay my fears I decided to turn to boxed pectin. Unfortunately, I didn’t have any in the cabin, but with some searching and climbing of ladders Y. was able to find several packages of Sure-Jell For Lower Sugar in the barn.
Inside the Sure-Jell For Lower Sugar box was a sheet of recipes for fruit jams and jellies, both cooked and frozen, and a set of instructions. I understand that in jam making, as in baking, precise measurement is important, but the instructions in the Sure-Jell package make you think that your kitchen might blow up if you add even one granule too much sugar. They use bold type; bold, red type; bold, red, ALL CAPS type; bold, red, ALL CAPS type that they then highlight. It’s enough to put one off jam making altogether, especially when all of one’s (my) measuring cups and spoons are locked safe in a seafaring container at the bottom of the hill. I decided that I wasn’t sending anyone to outer space in my jam, so measuring my sugar in a mason jar and weighing my strawberries by means of a rudimentary scale composed of a bicycle tube box, a piece of wood and a can of scungilli would probably be good enough. Judging by the results—delicious, perfectly set jam—one doesn't have to be quite as EXACT (red, bold, highlighted) as they lead one to believe.
Strawberry Jam

Adapted from the Sure-Jell For Lower Sugar instructions

  • 6 cups quartered and crushed strawberries,
  • about 3 pounds unprepared fruit
  • 4 cups sugar
  • 1 box Sure-Jell For Lower Sugar
  • Wash and sterilize enough jars to hold 8 cups jam. Pour boiling water over dome lids and allow to soak, off heat, until ready to use.
  • Core and quarter strawberries, then mash them with either a fork or potato masher. If some pieces don't get crushed, that's okay--it's nice to have some recognizable pieces of strawberry in the finished jam. Measure out six cups of fruit and place in large, heavy-bottomed, nonreactive pot.
  • Measure out sugar. Mix 1/4 cup of it with one package pectin and combine this mixture with fruit. Bring this mixture to a full rolling boil (one that won't stop bubbling when stirred) over high heat, stirring constantly. Add remaining sugar and bring back to a full rolling boil, still stirring constantly. Allow to boil 1 minute. Remove from heat and skim off any foam.
  • Give it another stir, then ladle into prepared jars, leaving 1/8-1/4 inch of headroom. Wipe off rims and threads and place lids and rings on jars, tightening only finger tight. Place jars on a rack in a canner, if you have one, or a very large pot, if you don't, and cover by 1-2 inches with water. Bring water to a gentle boil. After 10 minutes remove jars and place on a towel to cool. The lids should make a satisfying pop within minutes, indicating that they've sealed. Store in a cool, dark place; refrigerate after opening.
Now that I have preserved a taste of June to open in December or February, when I'll really need it, I might risk trying a batch of Sure-Jell free strawberry jam. Besides, if it doesn't set, it will still taste just as good stirred into yoghurt or spooned over ice cream.

Wednesday, June 22, 2011

Strawberry Spinach Salad

The strawberries are ripening now and we have eaten at least a quart of them straight from the garden unadorned, unadulterated, unembellished. They're perfect that way in all their red glory, but if you can muster the patience and will power to cut them up and add them to a dish, your efforts will not go unrewarded.
I was all set to have a go at Ovenette biscuits and to macerate some berries in sugar and Cointreau, but when I was weeding the garlic I noticed the spinach was just begging to be picked. Hmm, I thought, how 'bout a spinach and strawberry salad? A crumble of feta, a grind of pepper, a drizzle of olive oil, and a splash of vinegar later my salad was ready.
It is a very simple salad, but too much refinement, I think, would rob it of its charm. Like this, each ingredient shines on its own, while also complimenting the other elements. The crispy green-ness of the spinach remains intact and contrasts well with the juicy sweetness of the strawberries and the salty creaminess of the cheese.

Strawberry Spinach Salad

A delicate late spring salad

  • 1 handful spinach per salad
  • 3-4 strawberries per salad
  • a small piece feta or chèvre per salad
  • freshly ground pepper
  • coarse salt
  • extra virgin olive oil
  • vinegar of your choice
  • Double, triple, quadruple wash spinach to remove any trace of dirt/sand/grit. If the leaves are small enough, leave them whole, if not you probably shouldn't use them for salad anyway. Cut strawberries in quarters and set aside. Arrange spinach leaves and strawberries on plate in some attractive manner. Crumble cheese, grind pepper, and sprinkle salt over the top. Drizzle oil and splash vinegar over salad, being careful not to drown it, and serve.
I ate my salad for lunch with a couple Wasa sesame flatbreads, though I think a nice piece of monkfish would have done it better justice.

Friday, June 17, 2011

June is for Strawberries

This is what hope looks like. This is why I get up in the morning. This is why I dream at night. This is why I leave the shopping on the porch and go for a walk in the garden before I unlock the front door. This is next Wednesday's breakfast. This is frozen strawberry soufflé in waiting. This is the reason I needed to attempt making biscuits in the Ovenette. This is why you stay tuned.

Tuesday, June 14, 2011

Radishes

I find it difficult to fathom things that are very, very, very old. My mind goes into a sort of warp and I end up feeling small, inconsequential. I didn’t know until this morning that radishes could have this effect on me. Turns out they’re old. Very, very, very old. Nine-millennia-of-human-cultivation old. So old that no one is quite sure of their origins. So old their wild ancestor has disappeared into those proverbial mists.
And yet, every spring they seem brand new. They’re one of the simplest and most gratifying things to grow. They sprout out of the ground after a few days and they’re ready to eat in a matter of weeks. In fact, waiting on radishes is not rewarded. As Waverly Root tells us, “radishes have to be harvested young, as soon as they become edible. An old radish is a worthless radish—woody, usually wormy and frequently hollow in the center.”
Adding to their charm is that radishes require no more preparation than a wash and a trim and a sprinkle of salt. Though I love them in salads, where they add both color and flavor and while they can be cooked or pickled, I have to agree with Alan Davidson when he suggests that “perhaps the most satisfactory way to eat them is to hold what is left of the green stalk between one’s fingers, rub the radish over a piece of butter, dip it in salt (as Evelyn, 1699, remarked, it brings its own pepper!), and eat it with bread and butter.”
I’m not sure that William Wallace Irwin had this in mind when he called radishes “gay and playful,” but carved into mice they’re just too cute and the perfect garnish for a cheese plate.

Radish Mice

Inspired by Y.

  • as many radishes as you want mice
  • cold water
  • Wash radishes and trim off the greens, leaving a bit of a 'nose' behind. Clean the 'tail', removing most of the tendrils coming off the main root. Using a paring knife, make two slits on either side of the radish where a mouse's ears would be. Repeat on remaining radishes. Soak in cold water for an hour or so, or until the ears stick out. When ready to use, cut a strip off the 'belly' of the mouse so that it will stand up instead of rolling on its side.

Wednesday, June 1, 2011

Cool as a Cuke: A Cocktail

Now that we can officially wear white shoes again, we can start talking about the official drinks of summer. The classics still stand, of course. I would never say no to a gin and tonic, nor turn down a mojito, nor a Pims No. 1 cup, nor any sort of fruity rum drink. This summer, however, I feel I am going to be drinking a preponderance of vodka-cucumber drinks.
Sometime in April a sparkling cucumber beverage sold in 7-ounce green glass bottles, catchily named Mr. Q Cumber, appeared on the shelves of the discount wing of the Co-op. Y. bought a couple just to try. At 2 for 99¢ the risk was not great and immediately paid off. After the first sip we decided we needed a case of the stuff; once we learned that it normally retails at over two dollars a bottle, we bought three.

Cool as a Cuke

makes one drink

  • 1 five-count pour vodka
  • 1 7-ounce bottle Mr. Q Cumber
  • ice
  • cucumber peel or slices for garnish
  • Fill a 16-ounce glass with 4-5 cubes of ice. Pour vodka over ice, counting out five seconds as you pour. Fill glass with Mr. Q Cumber (the entire bottle should bring drink to the top of the glass). Garnish with cucumber peel or slices and serve. To make peel into a curl, twist around your finger or a chopstick and hold for a few seconds.
Nothing compares to standing in the garden in the middle of summer eating a cucumber straight off the vine, getting a practical understanding of the expression “cool as a cucumber.” Mr. Q Cumber has, however, come as close as possible to bottling this experience. It’s bubbly and refreshing and not too sweet, containing no HFCS, and actually tastes like cucumbers. Mixed with either gin or preferably vodka (the cucumber flavor is more apparent) it makes the perfect summer cocktail. Cheers!

Wednesday, May 25, 2011

Planting Tomatoes

Before we get to the tomatoes, I’d like to assure you that although I haven’t posted a recipe here in months, I have been eating as well as ever. This is what I mean by living with a cook better that oneself: wild turkey twice in one month, the breasts stuffed on one occasion with Serrano ham and membrillo, on the other with Serrano ham and dried figs stuffed with roasted almonds; frog’s legs coated in panko, fried, and served with fresh horseradish (from the garden) sauce; seared sea scallops in a butter sauce topped with shavings of truffle chocolate; pitch-perfect cucumber, tomato, cilantro salad; Greek sausage and lobster frittata; fiddlehead and ramp soup; venison (from our woods)…you get the idea. Don’t worry, I will start documenting these meals and sharing them with you.
Now on to the tomatoes. The expression “as above, so below” applies to, well, almost everything, but to tomatoes also and that’s what we’re talking about. For a tomato plant to be healthy and happy above ground it needs to be healthy and happy below ground. That means it needs a robust root system and the teeny, tiny ball of roots that come out of a start pack just isn’t enough.
So what to do? The solution is to plant the tomato start so that it is parallel to the ground, burying the lower portion of the plant. The portion of stalk below ground will root, giving the tomato plant the support it needs to grow and produce to its full potential. Then it can spend its energy on making delicious tomatoes for your salad bowl or sauce pot not on struggling to survive. We’re so used to plants growing perpendicular to the ground that it seems strange, even wrong, to plant one lying down. It really is for the best, though, and within a few hours or a day the tomato plant will point itself up toward the sky, appreciative of the extra care you gave it.

Thursday, May 19, 2011

The Bauer is Back

Taking a cue from the garlic and asparagus, the tat soi and the soldier beans, I am finally reemerging after a long winter. A long winter that was not without its struggles, but over the course of which I moved to the mountaintop to live with my wonderful Y., learned that the only thing better than being a good cook is living with a better one, learned to ski, learned to make a fire, learned that hauling water and dishes and personal effects up and down a mountainside on a daily basis isn’t really that bad and a small price to pay to live in paradise—in short became a healthier, happier version of myself.
My geographical relocation means a number of things, but most pertinent to this post is the change in my proximity to the garden. I am now, instead of 20 miles, 20 feet from the garden, which makes keeping on top of the weeds so much easier. I can also check the progress of my seedlings daily (not weekly) and putter before breakfast while the kettle boils for tea.
There are two main things about gardening that will never cease to amaze me. The first is the miracle of putting a hard, dry, seemingly lifeless seed in the ground and several days or weeks later finding two tiny, green leaves in the same spot. You just put them in the ground and food comes up—simple. Simply amazing.
The other is they way time passes when you have your hands in the dirt. There are times when I intend to spend an entire morning in the garden, but the time to shower and go to work still seems to come too soon. There are others when I think I’ll just do a couple things and when I go back inside I find two hours have passed without my noticing. It's kind of like the way time melts away when eating and drinking in good company. So, hello again, I am glad to be rejoining yours.

Monday, October 18, 2010

Happy Fall

All of a sudden it's fall and I haven't done anything here since high summer. I'm sorry. Really, I am. I could bore you with excuses--a vacation, losing internet service at my house, my laptop going on the fritz, knee surgery (again), moving and then not moving and then living out of cardboard boxes until I actually do move--which I guess I did, but I'll spare you the details.
This pause does, however, have an upside: your Power to the Bauer withdrawal symptoms have probably abated by now, so the disappointment you feel when I announce a hiatus from blogging will hardly register. Yes, I'm afraid I will have to stop for a while. As I mentioned above, I am moving and my new residence is equipped with only a two-burner Coleman stove and lacks running water and although Y. cooked me an amazing nine-course meal the first time I went there and any number of divine meals since, I cannot claim to be as intrepid or innovative a cook as he. It is possible I will regale you with accounts of my adventures with the Ovenette, but I make no promises. It is also possible that I will soon have unlimited access to a state-of-the-art kitchen and will therefore be able to blog to my heart's content, but again I cannot be certain. I can offer only my sincerest apologies for not being there at harvest time to can with you and my regrets for having left anyone in the lurch. I wish you all happy cooking and happier eating and I hope to be back soon.

Monday, August 23, 2010

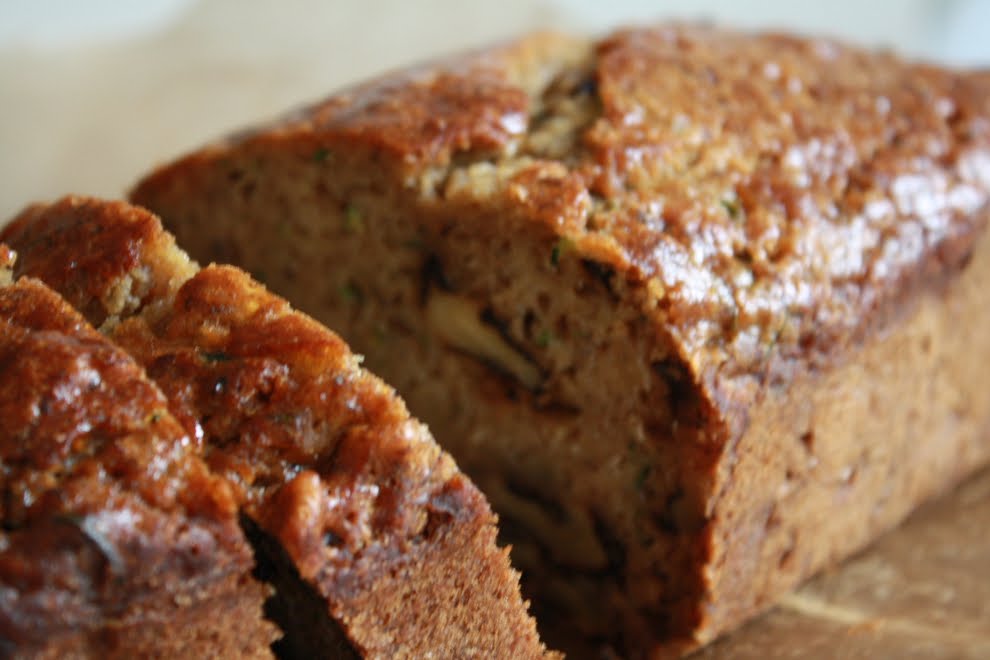
Zucchini Banana Bread

What would you do if you had staffed bananas getting frost bite in the freezer and a baseball bat of a zucchini you grew threatening to go soft in the crisper? There are, of course, any number of things you could do given these circumstances. As I have an extreme fondness for both banana and zucchini bread, I decided to make zucchini banana bread.
I didn't have a recipe, but after reading five or six recipes for other types of sweet, quick breads, I cobbled together this one. And then doubled it because do you know how many cups of grated zucchini my baseball bat gave me? Six, two of which I had to put in the fridge for use in something else. The recipe, although a confirmed success, could probably use some tweaking--a little less butter, maybe, or a tad a less sugar (because bananas are sweet!).

Zucchini Banana Bread

makes two 9x5-inch loaves

  • 3 cups all-purpose flour
  • 2 1/2 tsp. baking soda
  • 1/2 tsp. baking powder
  • 1 tsp. salt
  • 1/2 tsp. ground cinnamon
  • 1/4 tsp. ground cloves
  • a few gratings of nutmeg
  • 1 cup butter
  • 1 cup sugar
  • 4 eggs
  • 1 1/2 tsp. vanilla
  • 4 bananas, mashed
  • 4 cups grated zucchini
  • 2 cups walnut halves
  • Preheat oven to 350°F. Butter and flour two 9x5-inch bread pans and set aside.
  • Combine the flour, baking soda, baking powder, salt, and spices in a bowl and set aside. Cream the butter and sugar until light and fluffy then add the eggs, one at a time, beating well after each addition. Add the vanilla and banana pulp and mix mell. Gradually add the flour mixture, mixing well after each addition. Stir in the grated zucchini then the walnuts and mix until they are evenly distributed.
  • Pour batter into prepared bread pans and bake for one to one and a quarter hours, or until a skewer inserted into the center of a loaf comes out clean. Allow to cool in the pans for several minutes, then turn out onto wire racks to cool completely.
This bread is good warm out of the oven, though it's best not to cut it hot; it's good the next day at room temperature; but it is especially good sliced and toasted and enjoyed alongside a nice cup of something hot.

Wednesday, August 18, 2010

Neiman Marcus Cookies

I know I should be making something with all the fresh veg from the garden, or even from the farmers' market, but today I decided to face my chocolate chip foe and it turns out I can make chocolate chip cookies after all. I came across the Neiman Marcus Cookie recipe in the back of the WWD Neiman Marcus issue in the midst of my chocolate chip cookie despondency and it has taken me two months to gather the courage to try it.
I'm glad I finally did, because it was a success and has gone a long way in reducing my chocolate chip cookie making anxiety. The ingredients and proportions aren't that much different from those in other choc chip cookie recipes I have tried, except for the addition of instant espresso, but the oven temperature is considerably lower and the cookies are cooked for longer. I think this made all the difference, although it could just as easily have been the weather or the position of the stars or any other number of things over which I have no control.

Neiman Marcus Cookies

adapted from Women's Wear Daily

  • 1 3/4 cups all-purpose flour
  • 1/2 tsp. baking powder
  • 1/2 tsp. baking soda
  • 1/2 tsp. salt
  • 1 1/2 tsp. instant espresso
  • 1/2 cup butter, soft
  • 1 cup light brown sugar
  • 3 Tbs. granulated sugar
  • 1 egg
  • 2 tsp. vanilla
  • 1 1/2 cups chocolate chips
  • Combine the flour, baking powder, baking soda, salt, and instant espresso in a bowl and set aside. Cream the butter and sugars until light and fluffy then add the egg and vanilla and beat well to combine. Gradually add the flour mixture, mixing well after each addition. Add the chocolate chips and stir until they are evenly distributed.
  • Preheat oven to 300°F and refrigerate dough while the oven warms up. Drop generous teaspoonfuls of dough onto a parchment lined baking sheet and bake 17-20 minutes. Remove from oven and let cool for a minute or two before transferring to wire rack to cool completely. Repeat with remaining cookie dough.

Saturday, August 7, 2010

Peach and Pepita Chutney

In Jan Berry's Art of Preserving, she recommends this chutney as an accompaniment to grilled game hen or chicken. I'm sure peach chutney would be delicious with grilled game hen or chicken. But I like chutney with everything. Of course I like to serve chutney with Indian food, but I also like it on cheese sandwiches; on turkey sandwiches; with eggs: scrambled eggs, boiled eggs, egg salad sandwiches; with meats of all kinds.
You really can't go wrong with chutney. Nor can you go wrong with half-priced, local, organic fruit. When I saw the baskets of peach seconds at the farmers' market on Wednesday, my first thought, having just had success with wild blueberry jam, was peach jam. Y. asked me to make chutney instead and I was easily persuaded. The seconds were not so-called for no reason. They were bitten and bored into and already a bit on the mushy side. I thought if they were puréed they would make an excellent base and then I could get a few firmer peaches to cut into chunks. So that's what I did and I would do it again. The pepitas were not in Ms. Berry's recipe, but they add a nice textural element, and she used raisins where I prefer currants, and she used a red chili and I a habanero. So you can see: there's always room for modification.

Peach and Pepita Chutney

With inspiration from Jan Berry

  • 1 1/2 lb. overripe peaches
  • 1/2-3/4 lb. firm ripe peaches
  • 2 1/2 cups brown sugar
  • 1/2 cup currants or raisins
  • 2 generous Tbs. grated ginger
  • 1 onion, finely chopped
  • 2-4 garlic cloves, thinly sliced
  • 1 hot pepper, finely chopped
  • 1 1/4 cups white vinegar
  • 1/2 tsp. salt
  • 1/2-1 cup roasted salted pumpkin seeds
  • Place enough jars to hold 4 to 5 cups of chutney into a large pot along with their corresponding domes and rings. Cover with water and bring to a boil. Turn off heat and let sit in the hot water.
  • Peel and roughly chop the overripe peaches. Place them in a blender with about 1/4 cup of the vinegar and process until smooth. Set aside. Blanch the firmer peaches to make them easier to work with and then peel, pit, and cut into small wedges.
  • Place peach purée, peach wedges and all remaining ingredients except the pumpkin seeds in a nonreactive saucepan over medium heat. Stir until the mixture comes to a boil, then reduce heat and allow chutney to simmer 30-40 minutes. Remove from heat and stir in the pumpkin seeds.
  • Ladle chutney into prepared jars, wipe off the rims, and secure the lids. Re-submerge filled jars in the hot water and boil 10 minutes or so to seal. Remove from the water and allow to cool.

Tuesday, August 3, 2010

Consider the Oyster Mushroom

This is what I have managed to glean about the oyster mushroom in the past 48 hours: One, they're DELICIOUS. They're a shelf mushroom preferring to grow on maple trees and particularly old and feeble maple trees and usually too high up to be easily reached. That last bit might not actually be a preference of the oyster mushroom, but it seems often to be the fact of the matter. They might look within reach when you see them from the car, but when you get out and walk up to the tree, nine times out of ten (although I've only been car-shrooming for oysters once) you'll either have to attach your knife to a pole, and a long one, or you'll have to shimmy up the tree in order to reach the mushrooms. Or watch your intrepid boyfriend do the same. As the case may be. Other options include using a ladder or standing on top of your car. They're also kind of gross to clean, but remember point number one: they're DELICIOUS.
Guests often like to help out in the kitchen and there are many things they can do: wash lettuce; chop veg; assemble a salad, even; open wine; wash dish. If oyster mushrooms should be on the evening's menu and an enthusiastic guest offers to clean them, however, kindly ask him to make you another cocktail instead. It's not that oyster mushrooms are difficult to clean or even that they're so delicate as to require careful handling. No, it's just that they have developed a special relationship with a certain orange and black bug and when the mushrooms are bathed in salt water, which they should be, these bugs are forced out of their hosts and either float to the surface of the water or become lodged in the mushroom's gills, in which case a finger or a knife is required to permanently evict them from their home. A guest would, of course, be able to perform this duty, but after having done so, he may or (more likely) may not want to eat his dinner. So, please, clean your oyster mushrooms yourself and while so doing, if it helps or becomes necessary, remind yourself: they're DELICIOUS.
What makes them so DELICIOUS? Their inimitable mushroomy texture. Their earthy, woodsy flavor. Y. laughed when I said this, but I definitely detected a pleasant mollusk aroma when they were in the pan. Perhaps that is why they do so well sauteed with garlic and onion and simmered in white wine and when that's cooked down doused with heavy cream, cooked down again and served over pasta. Yes, oyster mushrooms are DELICIOUS.
NB: Please do not eat mushrooms you've gathered yourself unless you are absolutely sure they're what you think they are.

Saturday, July 24, 2010

Wild Blueberries

Last summer I discovered mulberries; yesterday I picked my first quart of wild blueberries. A walk around the block brought me to the mulberries; a drive across state lines and a five mile hike was necessary to find these blueberries, but it was well worth it. Wild blueberries are the very essence of blueberry. They're not as fleshy as their cultivated cousins and their seeds are more prominent, but they taste sweeter and bluer and somehow... berry-er.
These berries are probably best enjoyed in the woods: a sweet reward for energy spent, but if you do happen to have a container with you and if you have the self control to put more berries in the container than in your mouth and if you manage not to trip over any roots or rocks on your way down the mountain and spill your hard earned loot and if there are any berries left after the car ride home, you can make a delicious jam out of them.

Wild Blueberry Jam

Adapted from the Pomona's Universal Pectin box

  • 4 cups wild blueberries, mashed
  • 1/4 cup lemon juice
  • 2 tsp. calcium water
  • 1 cup sugar, more or less depending on your taste
  • 2 tsp. pectin powder
  • Cover jars, lids, and rings with water in a large pot and bring to a boil. Turn of heat and let stand in hot water.
  • Place berries and lemon juice in a pot and add calcium water. Mix well. Combine sugar and pectin powder in a separate bowl, mixing thoroughly. Bring the fruit mixture to a boil. Add the sugar-pectin mixture and stir vigorously for 1-2 minutes, until dissolved. Bring back to the boil and remove promptly from heat.
  • Fill jars to 1/4 inch from the top. Wipe rims clean and screw on the 2-piece lids. Put filled jars in boiling water to cover. Boil for 10 minutes. Remove from water and allow to cool, listening for the distinctive popping sound of jars sealing.
When I have made jam in the past, I have used only fruit and sugar and lemon juice, shying away from adding pectin. I liked the simplicity of it. What I didn't like, however, was the vast quantity of sugar required. I felt that I could hardly taste the fruit through the sweetness, so yesterday I heeded a piece of advice I overheard an old lady dispensing two jam-making seasons ago: "Just buy pectin and use the recipe in the box. It works every time." And it did work. And for four cups of fruit I used just one cup of sugar and my jam tastes like the wild blueberries from which it is made.