Tuesday, June 14, 2011

Radishes

I find it difficult to fathom things that are very, very, very old. My mind goes into a sort of warp and I end up feeling small, inconsequential. I didn’t know until this morning that radishes could have this effect on me. Turns out they’re old. Very, very, very old. Nine-millennia-of-human-cultivation old. So old that no one is quite sure of their origins. So old their wild ancestor has disappeared into those proverbial mists.
And yet, every spring they seem brand new. They’re one of the simplest and most gratifying things to grow. They sprout out of the ground after a few days and they’re ready to eat in a matter of weeks. In fact, waiting on radishes is not rewarded. As Waverly Root tells us, “radishes have to be harvested young, as soon as they become edible. An old radish is a worthless radish—woody, usually wormy and frequently hollow in the center.”
Adding to their charm is that radishes require no more preparation than a wash and a trim and a sprinkle of salt. Though I love them in salads, where they add both color and flavor and while they can be cooked or pickled, I have to agree with Alan Davidson when he suggests that “perhaps the most satisfactory way to eat them is to hold what is left of the green stalk between one’s fingers, rub the radish over a piece of butter, dip it in salt (as Evelyn, 1699, remarked, it brings its own pepper!), and eat it with bread and butter.”
I’m not sure that William Wallace Irwin had this in mind when he called radishes “gay and playful,” but carved into mice they’re just too cute and the perfect garnish for a cheese plate.

Radish Mice

Inspired by Y.

  • as many radishes as you want mice
  • cold water
  • Wash radishes and trim off the greens, leaving a bit of a 'nose' behind. Clean the 'tail', removing most of the tendrils coming off the main root. Using a paring knife, make two slits on either side of the radish where a mouse's ears would be. Repeat on remaining radishes. Soak in cold water for an hour or so, or until the ears stick out. When ready to use, cut a strip off the 'belly' of the mouse so that it will stand up instead of rolling on its side.

Wednesday, June 1, 2011

Cool as a Cuke: A Cocktail

Now that we can officially wear white shoes again, we can start talking about the official drinks of summer. The classics still stand, of course. I would never say no to a gin and tonic, nor turn down a mojito, nor a Pims No. 1 cup, nor any sort of fruity rum drink. This summer, however, I feel I am going to be drinking a preponderance of vodka-cucumber drinks.
Sometime in April a sparkling cucumber beverage sold in 7-ounce green glass bottles, catchily named Mr. Q Cumber, appeared on the shelves of the discount wing of the Co-op. Y. bought a couple just to try. At 2 for 99¢ the risk was not great and immediately paid off. After the first sip we decided we needed a case of the stuff; once we learned that it normally retails at over two dollars a bottle, we bought three.

Cool as a Cuke

makes one drink

  • 1 five-count pour vodka
  • 1 7-ounce bottle Mr. Q Cumber
  • ice
  • cucumber peel or slices for garnish
  • Fill a 16-ounce glass with 4-5 cubes of ice. Pour vodka over ice, counting out five seconds as you pour. Fill glass with Mr. Q Cumber (the entire bottle should bring drink to the top of the glass). Garnish with cucumber peel or slices and serve. To make peel into a curl, twist around your finger or a chopstick and hold for a few seconds.
Nothing compares to standing in the garden in the middle of summer eating a cucumber straight off the vine, getting a practical understanding of the expression “cool as a cucumber.” Mr. Q Cumber has, however, come as close as possible to bottling this experience. It’s bubbly and refreshing and not too sweet, containing no HFCS, and actually tastes like cucumbers. Mixed with either gin or preferably vodka (the cucumber flavor is more apparent) it makes the perfect summer cocktail. Cheers!

Wednesday, May 25, 2011

Planting Tomatoes

Before we get to the tomatoes, I’d like to assure you that although I haven’t posted a recipe here in months, I have been eating as well as ever. This is what I mean by living with a cook better that oneself: wild turkey twice in one month, the breasts stuffed on one occasion with Serrano ham and membrillo, on the other with Serrano ham and dried figs stuffed with roasted almonds; frog’s legs coated in panko, fried, and served with fresh horseradish (from the garden) sauce; seared sea scallops in a butter sauce topped with shavings of truffle chocolate; pitch-perfect cucumber, tomato, cilantro salad; Greek sausage and lobster frittata; fiddlehead and ramp soup; venison (from our woods)…you get the idea. Don’t worry, I will start documenting these meals and sharing them with you.
Now on to the tomatoes. The expression “as above, so below” applies to, well, almost everything, but to tomatoes also and that’s what we’re talking about. For a tomato plant to be healthy and happy above ground it needs to be healthy and happy below ground. That means it needs a robust root system and the teeny, tiny ball of roots that come out of a start pack just isn’t enough.
So what to do? The solution is to plant the tomato start so that it is parallel to the ground, burying the lower portion of the plant. The portion of stalk below ground will root, giving the tomato plant the support it needs to grow and produce to its full potential. Then it can spend its energy on making delicious tomatoes for your salad bowl or sauce pot not on struggling to survive. We’re so used to plants growing perpendicular to the ground that it seems strange, even wrong, to plant one lying down. It really is for the best, though, and within a few hours or a day the tomato plant will point itself up toward the sky, appreciative of the extra care you gave it.

Thursday, May 19, 2011

The Bauer is Back

Taking a cue from the garlic and asparagus, the tat soi and the soldier beans, I am finally reemerging after a long winter. A long winter that was not without its struggles, but over the course of which I moved to the mountaintop to live with my wonderful Y., learned that the only thing better than being a good cook is living with a better one, learned to ski, learned to make a fire, learned that hauling water and dishes and personal effects up and down a mountainside on a daily basis isn’t really that bad and a small price to pay to live in paradise—in short became a healthier, happier version of myself.
My geographical relocation means a number of things, but most pertinent to this post is the change in my proximity to the garden. I am now, instead of 20 miles, 20 feet from the garden, which makes keeping on top of the weeds so much easier. I can also check the progress of my seedlings daily (not weekly) and putter before breakfast while the kettle boils for tea.
There are two main things about gardening that will never cease to amaze me. The first is the miracle of putting a hard, dry, seemingly lifeless seed in the ground and several days or weeks later finding two tiny, green leaves in the same spot. You just put them in the ground and food comes up—simple. Simply amazing.
The other is they way time passes when you have your hands in the dirt. There are times when I intend to spend an entire morning in the garden, but the time to shower and go to work still seems to come too soon. There are others when I think I’ll just do a couple things and when I go back inside I find two hours have passed without my noticing. It's kind of like the way time melts away when eating and drinking in good company. So, hello again, I am glad to be rejoining yours.

Monday, October 18, 2010

Happy Fall

All of a sudden it's fall and I haven't done anything here since high summer. I'm sorry. Really, I am. I could bore you with excuses--a vacation, losing internet service at my house, my laptop going on the fritz, knee surgery (again), moving and then not moving and then living out of cardboard boxes until I actually do move--which I guess I did, but I'll spare you the details.
This pause does, however, have an upside: your Power to the Bauer withdrawal symptoms have probably abated by now, so the disappointment you feel when I announce a hiatus from blogging will hardly register. Yes, I'm afraid I will have to stop for a while. As I mentioned above, I am moving and my new residence is equipped with only a two-burner Coleman stove and lacks running water and although Y. cooked me an amazing nine-course meal the first time I went there and any number of divine meals since, I cannot claim to be as intrepid or innovative a cook as he. It is possible I will regale you with accounts of my adventures with the Ovenette, but I make no promises. It is also possible that I will soon have unlimited access to a state-of-the-art kitchen and will therefore be able to blog to my heart's content, but again I cannot be certain. I can offer only my sincerest apologies for not being there at harvest time to can with you and my regrets for having left anyone in the lurch. I wish you all happy cooking and happier eating and I hope to be back soon.

Monday, August 23, 2010

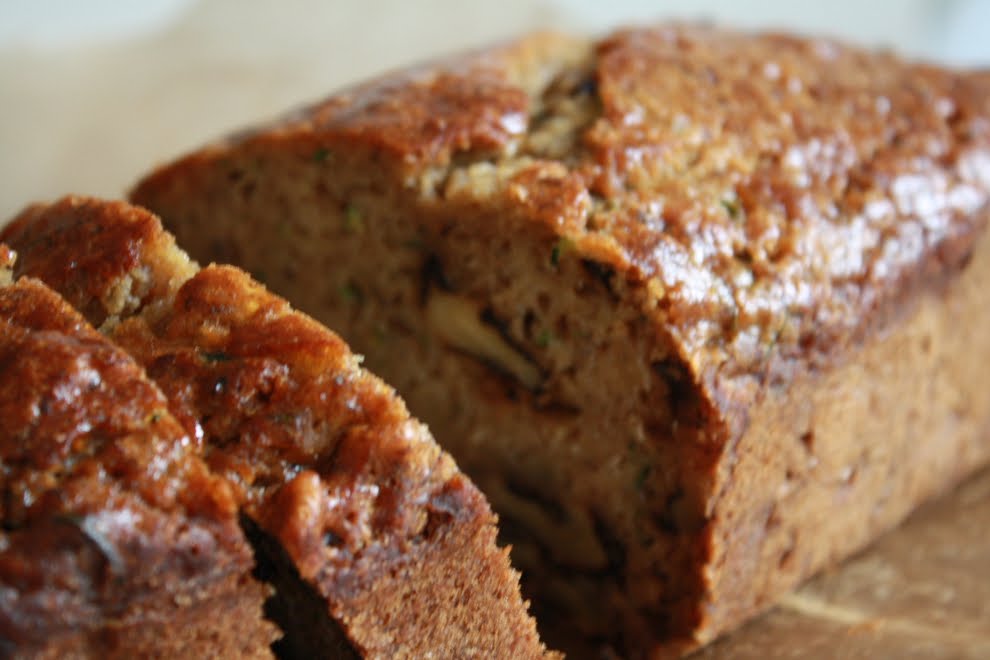
Zucchini Banana Bread

What would you do if you had staffed bananas getting frost bite in the freezer and a baseball bat of a zucchini you grew threatening to go soft in the crisper? There are, of course, any number of things you could do given these circumstances. As I have an extreme fondness for both banana and zucchini bread, I decided to make zucchini banana bread.
I didn't have a recipe, but after reading five or six recipes for other types of sweet, quick breads, I cobbled together this one. And then doubled it because do you know how many cups of grated zucchini my baseball bat gave me? Six, two of which I had to put in the fridge for use in something else. The recipe, although a confirmed success, could probably use some tweaking--a little less butter, maybe, or a tad a less sugar (because bananas are sweet!).

Zucchini Banana Bread

makes two 9x5-inch loaves

  • 3 cups all-purpose flour
  • 2 1/2 tsp. baking soda
  • 1/2 tsp. baking powder
  • 1 tsp. salt
  • 1/2 tsp. ground cinnamon
  • 1/4 tsp. ground cloves
  • a few gratings of nutmeg
  • 1 cup butter
  • 1 cup sugar
  • 4 eggs
  • 1 1/2 tsp. vanilla
  • 4 bananas, mashed
  • 4 cups grated zucchini
  • 2 cups walnut halves
  • Preheat oven to 350°F. Butter and flour two 9x5-inch bread pans and set aside.
  • Combine the flour, baking soda, baking powder, salt, and spices in a bowl and set aside. Cream the butter and sugar until light and fluffy then add the eggs, one at a time, beating well after each addition. Add the vanilla and banana pulp and mix mell. Gradually add the flour mixture, mixing well after each addition. Stir in the grated zucchini then the walnuts and mix until they are evenly distributed.
  • Pour batter into prepared bread pans and bake for one to one and a quarter hours, or until a skewer inserted into the center of a loaf comes out clean. Allow to cool in the pans for several minutes, then turn out onto wire racks to cool completely.
This bread is good warm out of the oven, though it's best not to cut it hot; it's good the next day at room temperature; but it is especially good sliced and toasted and enjoyed alongside a nice cup of something hot.

Wednesday, August 18, 2010

Neiman Marcus Cookies

I know I should be making something with all the fresh veg from the garden, or even from the farmers' market, but today I decided to face my chocolate chip foe and it turns out I can make chocolate chip cookies after all. I came across the Neiman Marcus Cookie recipe in the back of the WWD Neiman Marcus issue in the midst of my chocolate chip cookie despondency and it has taken me two months to gather the courage to try it.
I'm glad I finally did, because it was a success and has gone a long way in reducing my chocolate chip cookie making anxiety. The ingredients and proportions aren't that much different from those in other choc chip cookie recipes I have tried, except for the addition of instant espresso, but the oven temperature is considerably lower and the cookies are cooked for longer. I think this made all the difference, although it could just as easily have been the weather or the position of the stars or any other number of things over which I have no control.

Neiman Marcus Cookies

adapted from Women's Wear Daily

  • 1 3/4 cups all-purpose flour
  • 1/2 tsp. baking powder
  • 1/2 tsp. baking soda
  • 1/2 tsp. salt
  • 1 1/2 tsp. instant espresso
  • 1/2 cup butter, soft
  • 1 cup light brown sugar
  • 3 Tbs. granulated sugar
  • 1 egg
  • 2 tsp. vanilla
  • 1 1/2 cups chocolate chips
  • Combine the flour, baking powder, baking soda, salt, and instant espresso in a bowl and set aside. Cream the butter and sugars until light and fluffy then add the egg and vanilla and beat well to combine. Gradually add the flour mixture, mixing well after each addition. Add the chocolate chips and stir until they are evenly distributed.
  • Preheat oven to 300°F and refrigerate dough while the oven warms up. Drop generous teaspoonfuls of dough onto a parchment lined baking sheet and bake 17-20 minutes. Remove from oven and let cool for a minute or two before transferring to wire rack to cool completely. Repeat with remaining cookie dough.