Friday, August 28, 2009

Basil Two Ways in Tuile Cups with Peaches

Several months ago in the July/August 2009 Cucina Italiana, I saw a picture of peach slices and sorbet garnished with ribbons of basil. I could only assume it was the sorbetto di limone e basilico su letto di pesche, or, as I learned from the ever helpful translation, lemon and basil sorbet with peaches. That sounded good enough, but having a hard time getting behind any dessert that doesn't somehow incorporate heavy cream, I decided it needed to be accompanied by basil ice cream.
The sorbet was good, the peaches (the first from my fall fruit share) were excellent, but the ice cream was divine. The sorbet would shine, I think, as an intermezzo, but for dessert give me the ice cream. At first it's just pure, creamy, not too sweet heaven and then at the end you get the basil flavor, which goes very nicely indeed with the sweet tartness of the peaches.

Basil Ice Cream

adapted from Fine Cooking, Issue 99

  • 2 cups heavy cream
  • 1 cup whole milk
  • 3/4 cup sugar
  • salt
  • 6 egg yolks
  • 1 packed cup basil leaves, roughly torn
  • Mix 1 cup of the cream with the milk, sugar, and a pinch of salt in a medium sauce pan and place over medium heat. Warm the mixture, stirring occasionally, until the sugar is completely dissolved and small bubbles begin to form around the edge of the pan. Remove from heat and add the roughly torn basil leaves. Cover and let stand for 1 hour, or until flavor has achieved desired intensity.
  • Just before the hour is up, get your yolks ready in a medium bowl.
  • Remove basil leaves by either straining the mixture or scooping them out with a slotted spoon (or by any other method that suits your circumstances). Place mixture back over medium heat and warm until small bubbles once again form at the edge of the pan. Remove from heat and temper your yolks by pouring half the cream mixture over the egg yolks, whisking constantly as you do so.
  • Pour the yolk mixture back into the pan and cook over low heat, stirring constantly, until the custard thickens slightly and coats the back of a spoon and is able to hold a line drawn through it with a finger.
  • Have the remaining cup of cream ready in a medium bowl. When your custard mixture is ready, pour it through a strainer into the bowl holding the cream. Mix well and place a piece of plastic wrap on the surface of the custard, excluding any air bubbles, so a skin does not form. Place in the refrigerator for several hours until completely chilled.
  • [Alternately, you can place the remaining cup of cream in a metal bowl in an ice bath, strain the custard into that and stir the mixture until cool, then refrigerate. This will save you some time.]
  • Once the custard is cool, freeze in an ice cream maker according to the manufacturer's instructions. At this point the ice cream willresemble soft serve. Transfer to air tight containers and freeze until solid, 4 hours or so. Allow to stand at room temperature 10 minutes before attempting to scoop.

Lemon-Basil Sorbet

adapted from La Cucina Italiana, July/August 09

  • 2 cups water
  • 1 cup sugar
  • 10 basil leaves, roughly torn
  • zest and 2 Tbs. juice of one lemon
  • Combine water and sugar in a small heavy saucepan and cook over medium heat, stirring, until sugar has dissolved. Remove from heat and stir in basil leaves. Cover and let stand until cooled to room temperature, about an hour.
  • Once syrup is cool remove and discard basil leaves. Add lemon zest and juice. Refrigerate until completely chilled, or quick chill in an ice bath.
  • Freeze in ice cream maker according to manufacturer's instructions. Transfer sorbet to airtight container and freeze until solid, at least 3 hours. Allow to stand at room temperature 10 minutes before scooping.
Tuile cups are something I've been wanting to make for a while and they seemed fine vessels to hold my frozen basil desserts. They could just as easily be made into cones by rolling them into a cone shape when they come out of the oven instead of draping them to form little bowls.

Tuile Cups

  • 1/4 cup butter
  • 1/2 cup powdered sugar, sifted
  • splash vanilla
  • 2 egg whites, lightly beaten with a fork
  • 1/2 cup flour, sifted
  • Either by hand or at low speed in a stand mixer fitted with the paddle attachment, cream butter, sugar, and vanilla to a paste. Gradually add the egg whites while still stirring. Add the flour a little at a time and stir to make a smooth batter, being careful not to over-mix.
  • If decorating cups, reserve a small amount of the batter and add to it a drop of the food coloring of your choice.
  • Cover batter and chill in the refrigerator for 30 minutes. Preheat oven to 350°F.
  • Line a baking sheet with a silicon mat and, using a 6-inch circle template, spread out an even layer of batter. Carefully remove the template and repeat until you can fit no more cookies on your sheet. Place colored batter in a pastry bag and pipe lines on the circles.
  • Bake for 7-10 minutes, or until the edges turn golden brown. Remove immediately from silicon mat and drape over a mug or bowl to form the cup. You may have to train it somewhat with your fingers. Store in an airtight container until ready to use.

Sunday, August 23, 2009

Cheesecake

Ninety-nine times out of a hundred my yoghurt turns out well. It is almost a relief, then, when it doesn't, because when it doesn't I don't feel like I am depriving myself of its silky perfection when I turn it into waffles or, in this case, cheese. After twelve hours hanging in cheesecloth from the paper towel dispenser I don't use, my yoghurt turned into a tangy, rich, somewhat rustic cream cheese. My first thought was to herb it and put it on bread. My next thought was to make cheesecake.
Although her recipes can be less than explicit, I always learn something from Paula Peck and her book, The Art of Fine Baking, has become one of my go-tos. When I saw that her crumb crust called for nuts I was sold all over again. She suggests either pecans or walnuts and I went with pecans, thinking they would match well with the ginger oat biscuits I decided to use for the crumbs.
I guess I have been in Vermont for a while now, because I didn't think twice before deciding to use granulated maple sugar instead of cane sugar as the sweetener. I don't know how much the maple flavor came through, but the cake was sweet (though not too) and the sugar came from just down the road, which is always a bonus.

Cheese Cake

adapted from Paula Peck

  • 1 1/2 cups crumbs from snappy cookies or biscuits
  • 1 cup pecans, ground or finely grated
  • 1/3 cup butter, melted
  • 1 cup (maple) sugar
  • 20 oz. cream cheese
  • 1/4 tsp. salt
  • 1 1/2 tsp. vanilla
  • 1 tsp. grated lemon rind
  • 4 eggs, separated
  • 1 cup heavy cream
  • 1/2 cup sifted flour
  • Preheat oven to 325°F. Lightly butter a 9-inch spring-form pan.
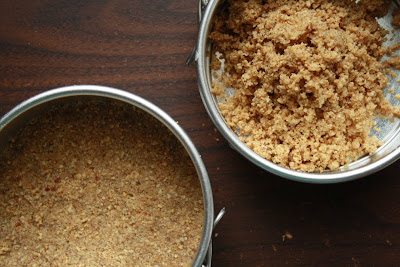
  • For the crumb crust: Combine cookie crumbs, ground nuts, and 2 Tbs. of the sugar. Add melted butter and mix until blended. Spread crumb mixture on the bottom of prepared pan and tamp it down firmly. Chill in refrigerator while you make the filling.
  • For the filling: Mix together cream cheese, half the remaining sugar, salt, vanilla, and lemon rind until well combined. Beat in the egg yolks.
  • Whip the cream and set aside. Beat egg whites to soft peaks. Gradually add the remaining sugar, beating well after each addition. Once all the sugar has been added, beat the whites until they are very firm. Pour whipped cream over the stiffly beaten whites followed by the cream cheese mixture. Sprinkle the flour on top and fold all together gently.
  • Pour filling into prepared pan and bake for one and a quarter hours, or until cake is a light golden brown. At this point turn the heat off, but leave the cake in the oven for 3-4 hours. Paula says, "Cake may crack slightly, but this is unimportant." Transfer cake to the refrigerator to chill before serving.
The ginger and pecan flavors were not obvious in the finished product, but I thought it would be pretty to decorate the cakes (I made two five-inch cakes from a half recipe, having only ten ounces of yoghurt cheese product) with pecan halves and crystalized ginger anyway. If you can find round, flat medallions of candied ginger, you can make nice ginger shapes with small cookie cutters.

Monday, August 17, 2009

Plum Sponge Pudding

I mentioned having made a peach plum sponge the other day and promised then to share the recipe with you. So here it is. You can make plum sponge with almost anything--peaches, berries, cherries, apples, any fruit will do--but I was reminded today that it really is best when made with plums. Their tartness stands up to the sugar, they cook down to the most enjoyable consistency, and they give the pudding a beautiful pink color. I guess they called it Plum Sponge Pudding for a reason.
Like most of the recipes from Farmhouse Cookery, Plum Sponge takes next to nothing to put together. This is one of those desserts you can make in a pinch, even when the pantry seems all but bare, and what emerges from the oven is definitely more than the sum of its parts.

Plum Sponge Pudding

adapted from Farmhouse Cookery

  • 1 pound plums
  • 1/2 cup brown sugar
  • 1/3 cup granulated sugar
  • 1/4 cup butter
  • 3/4 cup flour
  • 3/4 tsp. baking powder
  • 1/4 tsp. salt
  • 1 egg, beaten
  • 1 Tbs. water
  • Preheat oven to 350°F. Butter a 1-quart (or slightly smaller) ovenproof bowl and set aside.
  • Wash and halve plums, removing the stones. Put the plums and brown sugar in the baking dish in alternate layers.
  • Cream butter and sugar until light and fluffy. Combine flour, baking powder and salt. Add flour mixture and egg alternately to butter mixture, beating well after each addition. Stir in the water.
  • Cover fruit with the sponge mixture and bake about 50 minutes, or until top of the sponge is springy to the touch. Allow to cool at least 20 minutes before serving.

Wednesday, August 12, 2009

Chicken

Five days ago I helped a friend process nine of his chickens. That's a nice way of saying that I assisted in killing, scalding, and making ready for the pot nine birds of his dwindling flock of fifty. Having already assisted at a pig slaughter, I thought I could probably handle chickens. Don't get me wrong--killing animals is never easy, I just thought slaughtering small(ish, at this point) birds would be somewhat less affecting than doing the same to large mammals. And it was, though I was still only able to kill one of them--the second one I just couldn't do. The only good things about killing your own chickens (or those of someone you know) are knowing what they've been eating, where they've been living, that they were killed in the open air under sanitary conditions, and, of course, eating them. Well raised, happy chicken just tastes better, which I know because Y. was generous enough to give me one and I cooked it up this morning.
I have neither a decent-sized roasting pan nor a rack so I use my wide 3 1/2-quart Le Creuset and whatever vegetable/citrus fruit/tuber I happen to have on hand to keep my chicken off the bottom of the pot. Rings of onion or rounds of sweet potato are my favorites, but this morning I only had a lemon so I used that along with four cloves of fresh garlic. Resting your bird on food instead of a rack has its perks: you're left with some delicious morsels in the bottom of the pan. I wasn't sure what to do with the lemon and garlic, but I saved them anyway. At lunch I decided to make a sandwich with the wings and it occurred to me to spread the roasted garlic cloves on the bread. So I did. And it was good.
A well roasted chicken is a wonderful thing; a dry roast chicken is so disappointing. If you've ever heard the twenty-minutes-per-pound-plus-twenty-minutes rule, forget it. If I had followed it today I would have left my four-and-a-half pound chicken in the oven for 110 minutes or 20 minutes longer than the 90 minutes it took to roast it to moist, succulent perfection. After 90 minutes the juices were clear and 20 minutes of resting under foil ensured a done (and moist, 'cause it gives the juices a chance to run back into the meat) chicken. Never underestimate the power of holdover cooking.

Basic Roast Chicken

infinitely adaptable

  • 1 4 to 5-pound chicken
  • 1 lemon
  • 2 Tbs. butter
  • salt
  • freshly ground pepper
  • an onion or potato or sweet potato or lemon ororor
  • Bring your chicken to room temperature. This means leaving it on the kitchen counter for several hours, which might scare you, but it needn't.
  • Preheat oven to 450°F. Instead of rinsing your chicken, cut a lemon into quarters and use to clean the chicken, rubbing it with the lemon wedges inside and out. Discard lemon.
  • Cut onion or potato or sweet potato or lemon or whatever you choose into rings and arrange on the bottom of what you have chosen to roast your chicken in. Add a few whole cloves of garlic (peeled or not) if you feel like. Place chicken on sliced fruit/veg/tuber and tie up its legs. Melt butter and pour over chicken, using your fingers to make sure the butter is evenly distributed and covering everything. Season generously with salt and pepper.
  • Place in 450-degree oven and immediately reduce the temperature to 375°F. Roast for an hour and a half. After this time check that the juices are running clear and remove from oven. Allow to rest 20 minutes under foil before carving.
It is almost a shame that it turned out so well. I wish now that I'd saved it and shared it with somebody, but at least I'll be eating like a king this week.

Tuesday, August 11, 2009

More Peaches, More Pastry

I went to a friend's house for dinner last night, which gave me an opportunity to make another peach tart. As I said in my last post, I wanted to try something with a custard and once again Paula Peck came through with a recipe. Hers is a Sour Cream Custard Cherry Tart. Mine was a Crème Fraîche Custard Peach Tart. But it's the same idea: fruit arranged in a tart shell covered with silky, rich custard.
I used crème fraîche because what else would you use with a quart of the finest cream in your refrigerator door and the wherewithal to culture it, but feel free to use store-bought or sour cream or I'm sure it would be delish with mascarpone.
Paula doesn't bake the tart shell blind and neither did I, but next time I might. It seems when you put something as moist as custard in a tart shell, you should do what you can to ensure a crisp crust. Although it's hard to judge, because in the 95% humidity of last night anything would have gone soft regardless of precautions taken.
Despite the atmospheric conditions, the tart was a success and it was all I could do to keep myself from having the leftovers for breakfast.

Crème Fraîche Custard Peach Tart

adapted from Paula Peck's The Art of Fine Baking

  • 1 recipe rich tart pastry
  • 3 eggs
  • 1/3 cup sugar
  • 3/4 cup crème fraîche
  • 1/2 tsp. vanilla
  • 2 cups peach quarters (6-8 small peaches)
  • To make 2 cups crème fraîche: heat 2 cups heavy cream (not ultrapasteurized, preferably raw) to 165°F. (I started heating the cream to this point after several instances of a bacteria other than the one I introduced to my cream culturing, resulting in effervescent crème fraîche.) Allow the cream to cool to room temperature and stir in 2 tsp. yoghurt. Cover and leave in a warmish place 16-24 hours, depending on the level of tartness you wish to achieve. Resist any temptation to check on it as the bacteria do not like to be disturbed while they do their thing.
  • Line a 9-inch tart pan with pastry and chill in the freezer for at least an hour. Preheat oven to 350°F.
  • Bring a pot of water to the boil. Fill a bowl with cold water and set near the stove. Drop the peaches into the boiling water for 10-15 seconds and then transfer to the cold water with a slotted spoon. This makes both the skins and stones easier to remove. Once all the peaches have been blanched, peel them and split them in half to remove their stones. Cut small peaches into quarters; larger peaches can be sliced into more pieces.
  • Whisk together eggs and sugar until well combined. Add crème fraîche and vanilla and whisk until smooth.
  • Arrange peach slices attractively in tart shell then pour the custard mixture through a sieve over the fruit.
  • Bake about 45 minutes on the lowest rack in the oven, or until crust has browned and custard has set at the edges, but is still slightly jiggly at the center. Allow to cool completely before cutting.

Thursday, August 6, 2009

Peaches and Pastry

The same day I went blueberry picking, I also picked peaches. The peaches I picked that day are long gone--made into a plum sponge pudding (the recipe for which I will share with you one day) and devoured with vanilla ice cream--but the farm I went to started delivering to the co-op so I picked up a few more peaches Wednesday night. I have been wanting to make a fruit tart all summer and while berries are all well and good, when I saw the peaches I thought, "Peaches."
Somehow between going to the dentist this morning and going to work this afternoon, I managed to fit in my first peach tart trial. As usual, I read several recipes before jumping in and many of them--including Julia Child's, Paula Peck's, and one from this ancient Provençal book my sister gave me--put a layer of ground nuts between the crust and the fruit. Paula Peck adds cinnamon to the nuts and I followed her example. It is my guess that the nut layer acts as a barrier between the fruit and the crust, preventing the crust from becoming too soggy on the bottom. It is also delicious.
I was never quite sure why everybody insists on brushing fruit tarts with an apricot or currant glaze when they come out of the oven, but today I learned why. When my tarts came out of the oven the peaches, shiny and lovely when they went in, were lackluster; dull. The glaze restored their shine, their sheen, their peachy keen.
The real star, though, was the pastry. When making tarts, I usually just make a recipe of my go-to pie crust, but today I didn't. The recipe said, "rich tart pastry (230)," so I turned to page 230. The recipe called for 3 hard-cooked egg yolks so I had to try it. I am now completely convinced that hard-cooked egg yolks make the world go 'round. I had a clue after making Claudia Fleming's biscuits (thank you, Deb), which also call for hard-cooked egg yolks, but now I know. I took a bite of tart, an edge piece, and time stopped. My heart, my body, my everything melted as if in sympathetic reaction to what was happening in my mouth. It is a delicate pastry; it is a rich pastry; it is a heavenly pastry.

Rich Tart Pastry

thank you, Paula Peck

  • 2 cups flour, sifted
  • 3 Tbs. sugar
  • 3/4 cup butter
  • 1/2 tsp. salt
  • 2 tsp. lemon zest, grated
  • 3 hard-cooked egg yolks
  • 2 raw egg yolks
  • Sift flour into a mixing bowl. Make a well in the center of it and to it add the remaining ingredients, mashing the cooked yolks or passing them through a medium sieve. Using your finger tips, make a paste of the ingredients in the well and gradually incorporate the flour until a smooth, firm ball of dough is formed. Work quickly so the butter does not become oily. Chill the dough until it is firm enough to roll.
  • Roll dough between sheets of wax paper. Once you have lined your tart pan(s), chill in the freezer before baking.
If you find this pastry is altogether too fragile for your purposes, Paula notes that you can substitute 2 egg whites for the raw egg yolks, which will also make for a crisper crust.
I think I will look around for another tart recipe before I am satisfied--maybe something with a custard--but at least I have found the crust.

Tuesday, August 4, 2009

Two-Day-Old-Croissant-Blueberry Pudding

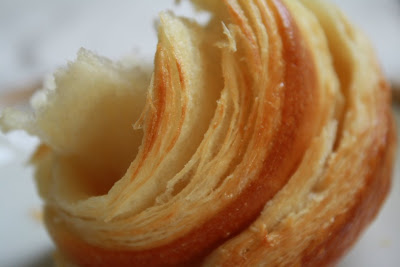
Saturday morning I made croissants. Saturday afternoon I went blueberry picking. By Monday afternoon they both had to be either used or tossed. I also had a quart and a half of milk to finish before my Wednesday pick up at the farm. All signs pointed to bread pudding.
I've said before that I love pudding. My love of pudding certainly extends to bread pudding, despite a few dry, bland puddings I have endured in the past. They don't have to be that way. Starting with a soft, absorbent bread (such as the croissants used here) and baking it in a dish deeper than you think advisable are two ways I have found to ensure a moist pudding. The recipe from the Joy of Cooking that I based this on called for only 1/4 teaspoon of salt, but after tasting my pudding (and fearing falling into the bland category) I felt it could use a little more.
So here is a moist and tasty bread pudding studded with sweet and tart blueberries--a good dessert; a decadent breakfast.

Croissant-Blueberry Pudding

adapted from a Joy of Cooking bread pudding recipe

  • 4 cups stale croissant cubes (4 medium-sized croissants)
  • 3 cups whole milk, warmed
  • 1/2 tsp. salt
  • 3 eggs, separated
  • 1/3 cup sugar
  • 1 tsp. vanilla
  • 1/2 tsp. nutmeg
  • juice and zest of half a lemon
  • 1 1/2 cups blueberries
  • Preheat oven to 350°F. Butter a 1 1/2 to 2-quart baking dish and set aside.
  • Add the salt to the warm milk and soak the croissant cubes in this mixture for 15 minutes. Combine the egg yolks, sugar, vanilla, and nutmeg and beat well. Add the lemon juice and zest to the yolk mixture and beat to combine. Whip egg whites to stiff peaks. Pour the egg yolk mixture and the blueberries over the soaked croissant and stir gently until well combined. Fold in the egg whites.
  • Pour mixture into prepared baking dish. Set baking dish in a pan of hot water and bake for 45 minutes to an hour.

Sunday, August 2, 2009

Reward of a Sleepless Night

I hardly slept a wink Friday night. Which is odd, because I always sleep. I love to sleep. I live to sleep. But on Friday night, I didn't sleep. I went to bed around eleven and was still awake at midnight. I heard every word of the hour-long, drunken conversation outside my window. I heard different drunken people retching in the street. I heard crickets. I heard my refrigerator cycle on and off. At 3:30 I got up and made myself a cup of hot milk and read a chapter of Le Comte de Monte-Cristo. I turned my light back off and tried to go to sleep. At 4:30 I decided to make croissants--just a half batch.
There was a point at which I asked myself if I was really doing this and wondered what other people did when they couldn't sleep. But I let it go and dissolved my yeast and kneaded my dough and pounded my butter and five hours later I was eating a perfect croissant with some of my own (less than perfect, but still delicious) raspberry jam.

Croissants

adapted from Andrew Whitley

  • 5 g active dry yeast
  • 385 g milk, cold
  • 600 g strong white flour
  • 5 g sea salt
  • 250 g butter, slightly salted or unsalted
  • 1 egg, beaten for brushing
  • I (when croissant making isn't my answer to insomnia) prepare my butter the night before so I don't have to mess with it the day of. Place your butter in the middle of a plastic bag or between two sheets of plastic wrap and carefully mash it down with a rolling pin until it becomes rollable. Roll the butter out into a sheet, making it as rectangular as possible, using the edges of the bag to your advantage. Make sure your butter is well wrapped and place in the fridge.
  • Dissolve the yeast in the cold milk. It seems like the yeast might never dissolve, but it does. Make up a dough with the flour, salt, and yeast mixture. It should be a pretty stiff, stretchy dough. Too soft and the butter will break through the dough and then you won't have the layers you want. After kneading your dough for about ten minutes, place it in a plastic bag and refrigerate for at least half an hour.
  • Roll out your dough until it is approximately twice as long as it is wide. Place your butter sheet over two-thirds of the rolled out dough, handling it as little as possible. If it is the wrong shape, or if there isn't enough at the edges, break off bits and put them where they need to be. Fold the unbuttered dough over half of the buttered section. Fold the remaining buttered section on top of what was the unbuttered section. Congratulations, you have a billet and two butter layers. Now roll it out again in the opposite direction than you did before, again aiming for it to be twice as long as it is wide. This time you want to do a book turn: fold the narrow edges in towards each other so they meet in the middle (leave some space for the next step of the fold), then fold the dough in the middle as if you're closing a book. You know have 8 dough-butter-dough layers. Put your dough back in its bag and back in the fridge.
  • After half an hour (or up to two hours) take your dough out of the fridge and roll it out again, the opposite way from the last time. Do another book turn. Now you have 32 layers, which Andrew says is the "maximum desirable number for a croissant dough" and he, too, defers to experts. Put your dough in the fridge for another half-hour.
  • This will be your final roll. Roll out the dough so it is about 5mm thick. Andrew likes equilateral triangles, but I have had better luck with triangles that are taller than they are wide at the base. So. Square up your dough and cut it horizontally so you have two very long pieces of dough that are each about (and here I revert to inches) 6 inches wide, a little more if possible. Take a ruler and make a mark every 4 inches along the bottom of one of your strips. Make a mark 2 inches in on the top and then, starting at that mark, every 4 inches. Using these marks as guides, cut out triangles. Repeat the process on the other piece of dough. Feel free to vary the measurement depending on how big or small you want your croissants. Andrew says this recipe makes 16, but I usually only make 10, give or take.
  • Make a half-inch notch in the center of the base of each triangle. To form a croissant, take a triangle in your hand. Hold the apex and the base and stretch it gently. Then gently stretch the base. You should end up with something vaguely resembling the Eiffel Tower. How fitting. Place the stretched out triangle back on your work surface. Fold the base tightly over on itself and then, taking the apex with one hand, keep stretching it slightly while you roll the croissant up with your other hand. Place on a parchment lined baking sheet so the tip is underneath the croissant (otherwise it might unroll during proving.) Turn the ears inward to make the classic croissant shape. If that makes any sense at all, repeat with the remaining triangles.
  • Once all the croissants are on baking sheets brush them with the egg wash and place in a warm (but not too warm or all the butter will ooze out) place to prove. At about 80°F proving takes 1-1/2 to 1-3/4 hours. Once the croissants are done proving--they look puffy and fragile and somewhat transformed--gently brush again with egg wash and place in a 400°F oven for 15-20 minutes.
  • You can also make pains au chocolat by cutting out rectangles instead of triangles and rolling a stick of good chocolate up in the dough. Pinch the edges together so the chocolate doesn't run out during baking. Wash, prove and bake as for croissants.

Saturday, August 1, 2009

Raspberry Jam (Almost)

I know I said I was going to make loads of strawberry jam. Well, I didn't. I had knee surgery in the middle of strawberry season and by the time I was ready to go picking, the strawberries were gone. They say strawberry jam is one of the trickiest jams to make anyway, so perhaps it is for the best. I failed on the strawberry front, but I was not about to do the same with the raspberries. There was, of course, the added incentive of my mother's request to have fresh raspberry jam between the layers of her birthday cake.
Mom and I had planned to go raspberry picking together, but after going out the wrong road for several miles, getting iffy directions from a gas station attendant, and coming upon a farm stand selling berries already picked and sorted and just as local, we bought three pints of berries and drove home. We chose, by taste test, the Brandywine raspberry, which, according to the Woodstock Nursery of Neillsville WI, is a cross between the black and red raspberry and is "unsurpassed for jam, jelly, and pies."
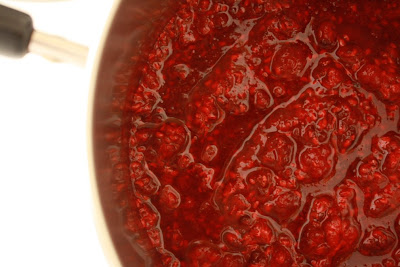
Everything I read led me to believe that raspberry jam was practically foolproof. No pectin, no water, just berries and sugar and heat. And, I came to learn, experience. It seems that the fewer ingredients there are, the more technique and know how matter. Everything seemed to be going fine. The berries bubbled, the sugar dissolved, the mixture boiled for several minutes and reached the required 220°F, but my lids didn't pop and my jam didn't set. I couldn't deal with it right away--I had to go to work--but when I got home at 10 I poured the syrupy disappointment back into my pot and brought the lot back to the boil. This is probably not kosher. Leagues of grandmothers are shaking their heads, ringing their aprons, wishing they could show me the way. I wish they could too. But I did. I brought the lot back to the boil and when it reached 220°F, I let it boil a little longer. I poured it into my re-sterilized jars and went to bed, although not before making chocolate curls for the top of my mom's cake, but that's another story. In the morning, my lids still hadn't popped, but the jam was much thicker than it had been the day before. To make my jars seal I put them in my steamer pot in the deeper basket (the one I never know what to do with) in about an inch of water and brought it slowly to the boil. After a few minutes I heard three satisfying pops, turned of the heat and let the jars cool a bit before removing them. I cannot call my first jam making experience an unequivocal success, but I learned plenty and I was able to use it for my mom's cake.

Raspberry Jam

makes 3-4 cups

  • 2 pounds raspberries
  • 2 pounds good quality granulated sugar, warmed
  • Place clean jars in a dish and place in cold oven. Set oven to 250°F. Place sugar in a shallow baking dish so the sugar is about an inch deep and set aside. When the oven comes up to temperature put in the sugar and allow it to warm for 10 minutes.
  • Place berries in a jam pot, if you have such a thing, or any other wide, deep pan. Mash berries with a wooden spoon and put on low heat. Stir berries occasionally so they do not stick to the pan. When the berries begin to bubble, after about 10 minutes, add the warmed sugar and stir gently until it is completely dissolved. Increase heat and boil until setting point is reached (220°F or point at which jam wrinkles and is reasonably stiff when a teaspoonful is pressed on a plate taken right out of the freezer), 5-10 minutes. Allow jam to cool for a couple minutes, stir to distribute the fruit, and pour carefully into warm jars.
This recipe is adapted from several sources, including Jan Berry's Art of Preserving and one of my go-tos, Farmhouse Cookery. Both used equal amounts, by weight, of berries and sugar. I lost almost a pound of berries to mold (after just one day!) and was left with just 1 lb. 2.25 oz. of berries so I used the same amount of sugar. Who knows, maybe using fewer than two pounds of fruit was my first mistake. Everything I read called for warmed sugar. After some investigation (i.e. reading the basics section) I learned this is to avoid lowering the temperature the berries have already reached. Jan Berry says, "Raspberries set very well, unlike strawberries, so it makes great sense to conserve this summer fruit for cooler times." I have not given up. I am determined to try again. If this is your first attempt, though, I hope you have better luck than I.