Thursday, December 31, 2009

Orange Torte

Here I go again with the oranges and chocolate. It's a good combo, what can I say? I was drawn to this torte in particular because the entire orange is used: peel, seeds and all. Cool, no?
This recipe is for a 9-inch torte, but my new cake stand won't accommodate a cake that big (and I prefer smaller cakes anyway) so I used two smallish blood oranges and halved all the other ingredients. I should have poured all the batter (or most of it) into one 6-inch pan, but, having divided it between two pans, saved the cake (I hope) by going double decker. Then there's the issue of the almonds. I should have blanched and ground my own almonds, but I was lazy and bought almond meal so what should be a lovely cake the color of sunshine is marred by the unwelcome presence of skins. But nevermind.

Orange Torte

adapted from Aaron Maree

  • 3 oranges
  • 6 eggs, separated
  • 180 g sugar
  • 1 tsp. baking powder
  • 280 g ground almonds
  • blank
  • 250 g apricot jam
  • 60 ml water
  • 2 tsp. lemon juice
  • blank
  • 1/2 recipe basic ganache
  • Place oranges in a pot, cover with water, and boil them for an hour and a half. While still hot, place oranges in a blender or food processor and blend to a pulp. Set aside.
  • Preheat oven to 350°F. Grease a 9-inch cake pan (or a combination of smaller pans) and line the bottom(s) with parchment. Set aside.
  • In a stand mixer fitted with the whisk attachment, beat egg yolks and half the sugar until yolks are pale and have reached the ribbon stage. Transfer to another bowl and set aside.
  • Wash your bowl and whisk attachment, then beat egg whites to stiff peaks, adding the remaining sugar in spoonfuls just before it reaches this stage. Add the ground almonds and baking powder and beat until well combined.
  • Fold yolk mixture into the orange pulp, then fold in the egg white mixture. Pour batter into prepared pan and bake for 30-40 minutes, or until cake is pulling away from the edges of the pan and springs back when lightly touched.
  • Cool on wire racks in the pan.
  • For the glaze: Combine jam, water, and lemon juice in a pan. Stir until thoroughly blended. Boil 10-15 minutes then force through a fine strainer.
  • Once cake is completely cool, turn it out and peel the parchment off the bottom. Coat with warm apricot glaze and place on serving dish. Allow glaze to cool then cover cake with warm ganache. Allow ganache to set then decorate as you wish--not at all, dusted with cocoa, adorned with chocolate curls or chocolate dipped orange segments...
It's not at all amazing, but amazingly frustrating, that some weeks you can do no wrong and others it's one semi-success (that is, flop) after the other. Wishing you more successes than failures in 2010 and the good nature to accept both gracefully. Happy new year.

Wednesday, December 23, 2009

A Festive Loaf

This is actually a Russian Easter bread called kulich, but the 'panettone' entry in the index of Andrew Whitley's Bread Matters sends you to the same page. It had all the right ingredients--flour, yeast, milk, fruit, peel, nuts, sugar--so I thought I'd give it a try. The result was a very small, but very festive loaf. If you plan to bake this recipe, I suggest making at least two, but more like four or eight loaves at a time. It's just too much work and waiting for only one.
This bread is one of the more wholesome things I've baked this month. The whole wheat flour gives the bread some substance, though it's still very soft and not at all dense, and the sugar is kept to a minimum. I used my quince brandy to soak the fruit and the flavors of cinnamon and star anise came through nicely.

A Festive Loaf

adapted from Andrew Whitley

  • 60 g raisins
  • 50 g slivered almonds
  • 40 g candied mixed peel
  • quince brandy to cover
  • blank
  • 5 g sugar
  • 2.5 g active dry yeast
  • 60 g milk, warm
  • 50 g whole wheat flour
  • blank
  • 30 g sugar
  • 70 g white bread flour
  • 40 g whole wheat flour
  • 1 egg, beaten
  • ferment, from above
  • 50 g salted butter, softened
  • The night before you're going to bake, combine the raisins, almonds, peel, and brandy (or rum, or vodka, or fruit juice) in a jar. Cover, shake, and set aside.
  • Get out your paper panettone cases and set aside, or prepare an improvised version. Line the sides of a 5-inch cake pan with heavy brown paper about 6 inches tall. Then line the bottom and (now high) sides of the cake pan with parchment paper.
  • For the ferment: Dissolve sugar and yeast in the warm milk. Mix in flour to make a paste. Cover and put in a warm place to rise and fall, about an hour.
  • To make the dough: Combine flours and sugar then add egg and ferment. Mix to form a dough. Knead for a minute or so to fully combine, then knead in the butter. Your dough will become very soft and sticky, but do not add any more flour. Keep kneading and after about 10 minutes you will have a soft, but coherent dough. Alternately, you could knead the dough using the dough hook attachment on you mixer.
  • Form dough into a ball and place in a small greased bowl. Cover with plastic and leave to rise in a warm spot for about an hour.
  • Drain any excess liquid from your fruit-nut mixture and gently fold/knead into the dough. Allow the dough to rise for another half hour.
  • Carefully shape the dough so the top is tight, smooth, and unbroken, removing any bits of fruit or nut that might be sticking through the top. Place in baking case. Allow to rise to maximum expansion, about a half hour longer.
  • Bake at just over 350°F for 30-40 minutes, or until the top is nicely browned and a thin skewer inserted into the loaf comes out clean.
This slice is pictured plain--I wanted you to see the golden raisins and bits of almond--but it's much tastier with butter. It might be better yet toasted and spread with butter. In any case it's perfect for tea or coffee and I'm sure the loaves wrap quite well in brown paper and string to give to friends and neighbors.

Monday, December 21, 2009

Starry Mince Pies

Well, it's the Monday before Christmas so if you haven't already made your mincemeat, it's too late. It is the perfect time to start giving pies away, though, so happy baking to those of you who got your mincemeat made in time.
These were made using a mini muffin tin and a small star cookie cutter. No need to wet the edges to stick the stars down as the mincemeat holds them on and the egg wash helps too.
Wishing you moments of calm this week and best of luck in the kitchen.

Saturday, December 19, 2009

Meet the Medlar

Maybe you've seen a medlar before, perhaps even tasted one. I hadn't until a few days ago when a co-worker handed me half of one of these papery, pulpy fruits and said, "here, try this."
These members of the rose family, cousins of the apple, natives of Persia are quite peculiar. They're picked in late autumn, at which point they're green and hard and inedible, then stored and left to go through a process of fermentation and decay called "bletting," during which they turn soft and brown. Now it just remains to tear through the thin, papery skin to reveal the rich, aromatic pulp inside.
It is hard to describe medlars. They're not like anything I've eaten before. If I had to make a comparison, I would say the pulp tastes and feels very much like thick, rich apple sauce. It is subtly sweet and ever so slightly bitter on the aftertaste. A friend tried to compare medlars to persimmons, but I think the only similarity there is the bletting process both fruits go through to become edible. I was not convinced by the first bite, but kept eating and bought several to take home with me.
I enjoy eating them as is--tearing the skin and sucking out the pulp, taking care to spit out the large, slippery seeds. The Oxford Companion to Food said that in Victorian England medlars were brought to table where the pulp was scraped out and mixed with sugar and cream for dessert. Other options for medlars are jelly or medlar cheese, made like lemon curd, or something of your own creation, such as the piece of toast with medlar and stinky cheese Y. just handed me.
It is always a pleasure to try a new food, particularly one as exotic as a medlar. For this I have Scott Farm to thank, and the turns of fate that brought me to Vermont.

Wednesday, December 16, 2009

Orange Meringues with Chocolate Ganache

I never think to make meringues. That is, I never think to make meringues unless I've made custard first and have a bowlful of leftover whites staring at me with their big doe eyes daring me to pour them down the drain. But aren't these gorgeous? Wouldn't you love to part the tissue paper and find these inside? They're worth separating eggs for, friends, and making custard with the leftover yolks.
Martha wanted these made with peppermint extract and red food coloring, but I had in my cupboard orange extract and orange food coloring. Orange and chocolate are two flavors I think go together very well and are just as seasonally appropriate as peppermint and chocolate, so I thought the substitution a fair one.

Orange Meringues with Chocolate Ganache

adapted from Martha Stewart

  • 3 egg whites
  • 3/4 cup sugar
  • 1/2 tsp. orange extract
  • orange food coloring
  • blank
  • 1 cup heavy cream
  • 6 oz. dark chocolate
  • Preheat oven to 175°F. Line baking sheets with parchment or silicon mats and set aside. Fit a pastry bag with a small star tip and set aside.
  • Put egg whites and sugar in the bowl of an electric mixer. Place bowl over simmering water and stir until sugar has dissolved and mixture is warm. Fit bowl onto base of electric mixer and, with whisk attachment, beat mixture until whites are shiny and hold stiff peaks, mixing in orange extract just before they have reached this stage.
  • Paint 3 stripes of food coloring on the inside of the pastry bag. Place stiff egg whites in pastry bag and pipe as many small meringues as you can. Bake for about 1 hour and 40 minutes, or until crisp and dry, but not brown. Allow to cool completely(this doesn't take long).
  • For the ganache: cut the chocolate into small pieces and then grind into even smaller pieces in a food processor. Bring cream just to the simmer over medium heat. Add cream to food processor and process until ganache is smooth, 20 seconds or so. Transfer to a bowl and allow to cool until it is pipeable.
  • To assemble: Fit a pastry bag with a small round tip and put ganache in bag. Pipe some ganache on the bottom of one meringue and sandwich it with another, repeat. Place finished meringues on wire racks. Allow ganache to set about 30 minutes. Will keep in airtight containers at room temperature for about 2 days.
Indeed, it was more than fair; it was meant to be. The orange is sweet and high and the bitterness of the dark chocolate brings it back down to earth. This is mimicked by the contrasting textures: the airy lightness of the meringue is countered and complimented by the richness of the ganache. Although the meringue melts almost instantly--disappears well before you've finished the ganache--the orange flavor lingers and mingles with the chocolate, giving your entire mouth something to think about.
I kept the meringues small for several reasons. Mainly I think they're prettier that way. Just as importantly, they're twice as big when two are stuck together and I wanted the finished product to be able to be popped in the mouth and enjoyed in one bite. At this size they're small enough to fit on the saucer of an espresso cup--a nice presentation and an excellent accompaniment. You also get more this way, which can only be a good thing.

Sunday, December 13, 2009

Rusks

I thought maybe you had to grow up dipping Ouma brand rusks in Milo or rooibos in order for them to take over a small corner of your heart, but the ease with which I have been able to distribute the vast surplus of rusks this recipe left me with suggests otherwise.
There isn't a great deal to recommend rusks: they're only very slightly sweet and otherwise quite bland, hard, dry, and a bit of a nuisance to eat--crumbling or, once dipped, dripping tea down your chin. Strangely, none of this keeps them from being completely addictive. Once you start eating them, you won't want to have tea without one. I sent a bag home with M. and she told me this afternoon she's been eating them at breakfast, tea time, and for dessert. If that isn't a recommendation, I don't know what is.
I found several recipes for South African buttermilk rusks by doing a Google search, but have so far only tried the one mentioned above, which I can certainly recommend. I look forward to trying several more recipes, though, in hopes of more closely duplicating the perfect rusk of memory. A fool's errand, maybe as these come very, very close, but one that will always leave me with at least one tin of rusks in the pantry.

Thursday, December 10, 2009

Onion Tart

It seems strange that the first recipe I would try from my new book, The Fundamental Techniques of Classic Pastry Arts, would be a savory dish, but there you have it. A delicious savory dish, though, and one that I've already made twice.
But really, it's about as sweet as savory goes. There's the sweetness of the caramelized onions, the slightly different sweetness of the tomatoes (which I know I should not be buying in Vermont in December), both set off by the tangy saltiness of the cheese and the buttery goodness of the walnuts and the pastry.

Onion Tart

adapted from The Fundamental Techniques of Classic Pastry Arts

  • 1 cup pastry flour
  • 1/2 tsp. salt
  • 1/3 cup plus 1 Tbs. (6 1/3 Tbs.) butter, cold
  • 2-3 Tbs. water, very cold
  • blank
  • 2-3 large yellow onions, thinly sliced
  • 3 Tbs. butter
  • 2 large, ripe tomatoes, peeled, cored, and sliced
  • 2 oz. blue cheese, crumbled
  • generous handful walnut pieces, broken
  • salt and pepper to taste
  • For the pastry: Combine flour and salt. Cut butter into pieces and drop into flour mixture. Using a pastry cutter or your fingers, work the butter into flour until butter is well incorporated, but there are still visible pieces of butter. (Recipes often say, 'until mixture resembles small peas or coarse meal.') Using a fork, stir in water one tablespoon at a time, being careful not to add too much. When dough begins to from clumps, enough water has been added. Form the dough into a ball. The dough might be somewhat crumbly, but as long as you can make it into a ball it will be alright. Wrap in plastic and refrigerate at least half an hour before rolling.
  • Melt butter in a large, heavy-bottomed pan over medium-low heat. Add the onions and stir to coat with butter. Allow to cook very gently, stirring occasionally, until onions have caramelized, anywhere from 45 minutes to over an hour. Don't try to hurry the process. When onions are golden, remove from pan, season with salt and pepper, and allow to cool.
  • Preheat oven to 350°F. Roll out your dough and use it to line an 8 or 9-inch tart pan. Spread the cooled onions on the bottom of the tart shell all the way to the sides. Fold the edges of the pastry over the onions, creating a border. Place slices of tomato over the exposed onions and slightly overlapping the pastry border. Arrange most of the cheese on top of the tomatoes, then the walnuts, then the rest of the cheese.
  • Bake anywhere from 20-40 minutes, depending on the type of pan used. A metal tart ring will require less cooking time than the ceramic dish I used. Serve warm or at room temperature, but not hot, hot.
I think this could make beautiful single serving tartlets, with just one slice of tomato on the top and a nice mound of cheese and walnuts (or maybe pecans next time). It seems a third go at onion tart is definitely in the cards for me.

Tuesday, December 8, 2009

Chocolate Chai Spice Cake Ornaments

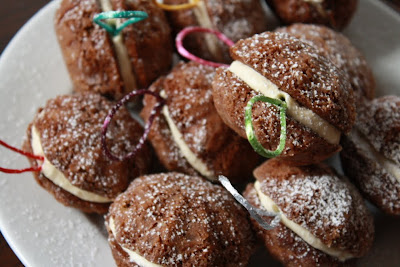
These are bordering on too cute, even for me, but when I saw the mold pan at the hospice thrift for only two dollars, I couldn't resist. My initial thought was to stack the small cakes somehow, or serve them drizzled with custard, but then at work it struck me: stick them together with buttercream and make them look like Christmas ornaments! And I think it worked.
I had some raw cream turning itself into crème fraîche in the fridge so I decided to try Nigella Lawson's Sour Cream Chocolate Cake. I know that sour cream and sour cream are not the same thing necessarily, but the cakes didn't seem to mind. They came out moist and rich and chocolaty and dense enough to really sink your teeth into. I want everything to have a warm, spicy flavor this time of year, so I ground up some of the Chai Walla's chai spice--a mixture of cardamom, cinnamon, cloves, ginger, and peppercorns--and added it to the batter.

Chocolate Chai Spice Ornaments

cake recipe adapted from Nigella Lawson

  • 1 1/3 cups flour
  • 3/4 cup sugar
  • 3/4 tsp. baking powder
  • 1/4 tsp. baking soda
  • 1/2 tsp. salt
  • 1 1/2 tsp. ground chai spice
  • 3/4 cup plus 2 Tbs. butter, room temp.
  • 3 Tbs. cocoa powder
  • 1/2 cup plus 2 Tbs. sour cream
  • 2 large eggs
  • 1 1/2 tsp. vanilla extract
  • blank
  • 1 1/8 cups confectioners' sugar
  • 5 Tbs. butter, room temp.
  • 1 1/2 tsp. milk
  • 1/4 tsp. vanilla
  • Preheat oven to 350°F. Butter and flour small cake molds and set aside.
  • Combine flour, sugar, baking powder, baking soda, salt, and chai spice in the bowl of a stand mixer. Add the butter and, using the paddle attachment, incorporate it into the flour mixture. In another bowl or a quart measuring pitcher, whisk together the cocoa, sour cream, eggs, and vanilla. Add slowly to the flour mixture and beat until thoroughly mixed.
  • Half-fill each mold with batter. Bake for about 15 minutes, or until a toothpick comes out clean. Turn cakes out onto a cooling rack. Rinse, re-butter-and-flour the molds and bake more cakes if necessary.
  • For the buttercream: using a fork and then a whisk combine ingredients and beat until smooth and pale.
  • When cakes are cool, trim the humps off the surface that is supposed to be flat. Spread a heaping teaspoon (or so) of buttercream on the flat side of one cake and then sandwich it with another cake. Press cakes together gently but firmly so the buttercream reaches the edges. Repeat with remaining cakes.
  • If the buttercream is very soft refrigerate the sandwiched cakes until it is firm. Cut small lengths of satin ribbon and push the ends into the buttercream using a skewer or toothpick or any other small pointed object. Alternately, you could press the ribbon into the buttercream before sandwiching the cakes. If the ribbon is long enough and you let the frosting harden, they might actually be functional. I don't know not having tried, but it's worth a go.
  • Arrange ornaments on a serving plate and dust with confectioners' sugar.
I am not a fan of either inedible or nonfunctional decoration, so the ribbons, while pretty, were a bit of a disappointment. Next time I'll either make ribbons out of sugar, or attach the satin ribbons in such a way that they will be able to bear the weight of the cakes. And if it doesn't work, oh well, because the ribbons really are pretty.
You might find that your cakes look a little chewed up when you turn them out of the molds, but don't let this upset you (I almost bagged the project after turning out my first batch of cakes). I find that a dusting of powdered sugar lends seasonal charm and gracefully disguises any number of sins.

Thursday, December 3, 2009

Chocolate Hazelnut Cups

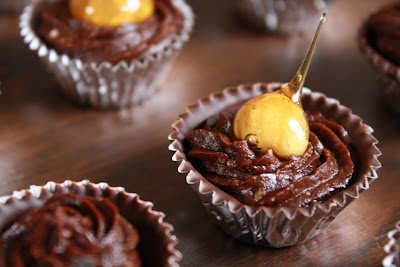
Don't these just say Christmas party all over them!? The golden glow of the candy, the silvery sparkle of the foil--one gets one's light where one can this time of year--the dark, velvety ganache studded with bits of hazelnut all contained in a dark chocolate cup: divine.

Chocolate-Hazelnut Cups

adapted from Farmhouse Cookery, makes 2 dozen

  • For the cups:
  • 3 oz. dark chocolate
  • 24 1-inch candy cups
  • blank
  • For the ganache:
  • 8 oz. dark chocolate
  • 1/4 cup heavy cream
  • 1 Tbs. butter, at room temp.
  • 2 Tbs. brandy
  • 2 oz. ground hazelnuts
  • blank
  • To decorate:
  • 1 1/2 cups sugar
  • 3/8 cup water
  • 30 (just in case) hazelnuts, toasted and peeled
  • For the cups: Arrange the candy cups (sweet cases according to the Farmhouse) on a baking sheet. Chop up the chocolate and place 2/3 of it in a double boiler. Melt over simmering water. Just before it is smooth take the chocolate off the heat and add the remaining chopped up chocolate. Stir, off the heat, until smooth. Line the cups with the chocolate by filling the cup up halfway with chocolate and then either swizzling the chocolate around until the entire cup is coated or using a teaspoon to spread the chocolate around and up the sides. Make sure the sides are thick enough or your cup will fall apart when it is unwrapped. Place in the refrigerator until fully hardened.
  • For the ganache: Chop up the chocolate, then place in a food processor and whiz into very small bits. Heat the cream until bubbles form around the edges. Add to chocolate and process until mostly smooth. Transfer chocolate mixture back to the pan and add butter. Stir until smooth. Add the brandy and hazelnuts and mix until combined. Allow ganache to cool until pipable.
  • For the decoration: Stick each hazelnut on a skewer with the top of the hazelnut pointing down when the skewer is held parallel to the floor. Prepare an ice bath that can accommodate your pan. Combine sugar and water in a small, heavy-bottomed pot over medium heat, stirring until sugar is COMPLETELY dissolved. Bring mixture to a boil and heat to just below hard crack, about 300°F, wiping the sides of the pot down with a wet pastry brush to prevent crystals from forming and ruining your syrup. When the desired temperature is reached, plunge pot in ice bath to stop the cooking. Remove and let cool until a skewer dipped into and then pulled out of the sugar leaves a thread trailing behind it. One by one, dip the hazelnuts in the syrup and pull them out. Let any excess sugar drip back into the pan. Cut the thread with scissors when it has stopped dripping and secure the skewer with the tip of the hazelnut pointing down between the counter and a breadboard. Allow to cool and harden completely. If the candy in the pot becomes too hard to work with, put it over low heat until it liquifies enough for dipping.
  • To assemble: Take chocolate cups from fridge. Transfer ganache to a pastry bag fitted with a medium-sized star tip. Pipe ganache into cups and top with hazelnut drops.
You might be tempted to make these larger, but in this case more of a good thing would just be too much. Like this they're a single mouthful of heart melting decadence without the sinful edge.

Sunday, November 29, 2009

Gingerbread Cut-Out Cookies

Well, Thanksgiving is over, which means it is officially not too early to start baking Christmas cookies. I'm not of the get-the-tree-up-the-day-after persuasion, I haven't even bought presents in years, but I do love to make cookies and candies and all sorts of pretty confections in the weeks leading up to Christmas. These gingerbread snowflakes were the first of the season--the first cookies and, strangely for Vermont, the first snowflakes.
I've been making this recipe for a few years--since mom and I couldn't resist Martha Stewart's Holiday Cookies special edition in 2006. I often find that Christmas cookies are prettier than they are edible. Not so with these. They're spicy--I particularly like the use of black pepper--and snappy and sweet, though not overly, and take very well to being dunked in a cup of tea.
Martha uses a royal icing for her snowflakes, but I don't really like to eat royal icing so chose this year to use a simple buttercream instead. The advantage of using royal icing is that it hardens well and the cookies are then stackable. The advantage of buttercream is that it tastes good and melts on your tongue in the way that butter will and offers an altogether superior eating experience. If I were to make these cookies purely for visual effect--to use to decorate a tree or window, for example--I would poke a hole in one of the spokes before baking the cookies and go with the royal icing.

Gingerbread Cut-Out Cookies

adapted from Martha Stewart

  • 3 cups flour
  • 1/2 tsp. baking soda
  • 1/4 tsp. baking powder
  • 1/2 cup butter
  • 1/2 cup dark-brown sugar, packed
  • 2 tsp. ground ginger
  • 2 tsp. ground cinnamon
  • 3/4 tsp. ground cloves
  • 1/2 tsp. finely ground black pepper
  • 3/4 tsp. salt
  • 1 large egg
  • 1/2 cup unsulfured molasses
  • blank
  • 2 1/4 cups confectioners sugar
  • 1/2 cup plus 2 Tbs. butter, room temp.
  • 1 Tbs. milk
  • 1/2 tsp. vanilla
  • sanding sugar
  • Combine flour, baking soda, and baking powder in a bowl and set aside.
  • Either by hand or in a stand mixer fitted with the paddle attachment, cream butter and sugar until fluffy. Beat in the spices and salt and then add the egg and molasses on a slightly lower speed. Add the flour mixture and mix until just combined. It might look like it will never combine, but don't despond, it will. Divide the dough in half (to make it more manageable when you roll it out), form into two balls, wrap well in plastic, and refrigerate for about an hour, or until cold.
  • Line baking sheets with parchment. Preheat oven to 350°F.
  • Roll out dough on a lightly floured surface to 1/4-inch thick. Cut out as many shapes as you can and place them on the baking sheets. Feel free to gather the scraps, re-roll the dough, and cut out more cookies. Refrigerate cookies until firm, about 15 minutes, before baking.
  • Bake 12-14 minutes, or until cookies are firm but not darkening around the edges. Cool on wire racks.
  • To make buttercream: Combine sugar, butter, milk, and vanilla using a stand mixer fitted with the paddle attachment. Beat until smooth and pale, scraping the bowl as necessary.
  • Pipe icing onto cookies in attractive patterns and sprinkle immediately with dusting sugar. Allow icing to harden, then tap off any excess sugar.
There is no reason to limit yourself to making snowflakes. What is Christmas without a few gingerbread men? The only other cutter I had readily available the day I made these was a maple leaf and I think they look just lovely. So, let the cookie making commence!

Thursday, November 19, 2009

Humble Pie

Until last Saturday, I thought the expression "humble pie" was purely metaphoric. But, of course, it's not. Y. shot a deer (a 140-pound 4-point buck) on the first morning of the season and that afternoon a short Google search including the terms deer, heart, and liver led me to humble pie. Noone was very specific when it came to recipes; deer heart and liver baked in a crust with apples, currants, and spices was about all I had to go on. It seems that while the lord of the manner was eating the tenderloins (and who can blame him--yum!), the help was given the offal. I cannot claim that the recipe I came up with is authentic. It is, however, very seasonally appropriate, reminiscent of mincemeat, and to my taste buds quite delicious.
This was a new pie making method for me. A few things I learned: use straight-sided jars, or jars with very little taper. The jars I used were angled enough to make the wrapping and tying process more of a bear than it needed to be. Make sure the string is tied tightly enough and that it doesn't slip down. If the string slips too far down, your pie will collapse during baking for not having enough support. This method should not be used for pies without top crusts--the top crust holds everything together and without it the edges would curl down in the oven.
Don't be discouraged, though. I only had one true failure--the rest were beautiful and entirely satisfying. If it does seem like altogether too much bother, just use small pie plates instead.

Humble Pie

makes about 6

  • 1 recipe pie crust
  • blank
  • 1- 1 1/2 cups deer heart and liver, chopped into small pieces
  • 2 apples, peeled, cored, and chopped into small pieces
  • 2 handfuls currants
  • zest of one lemon
  • 1/2 tsp. dried sage
  • 1/2 tsp. salt
  • 1 scant tsp. cinnamon
  • 1/8 tsp. ground clove
  • 1/8 tsp. ground allspice
  • 1/4 tsp. freshly grated nutmeg
  • 2 Tbs. brandy
  • 1-2 Tbs. flour
  • butter for dotting
  • 1 egg plus 1 Tbs. water for glazing
  • Make the filling the day before you plan to make the pies. Briefly sauté the chopped offal in a mixture of butter and oil in a very hot pan. Remove to the bowl you're going to mix the filling in from pan with a slotted spoon. You might see some juices from the meat at the bottom of the bowl, don't drain them. Add the apple, currants, zest, salt, and spices and mix to combine. Stir in the brandy. Cover and refrigerate until the next day.
  • On the day of pie making, remove the filling from the fridge to bring it to room temperature.
  • Make up your pastry dough, form it into two balls, one larger than the other, wrap the two balls tightly with plastic, and refrigerate for at least half an hour.
  • Have ready 6 straight sided jars inverted on a baking sheet. Roll out the larger ball of dough on a floured surface. Using a small plate (about 6 inches in diameter) as a template, cut out circles of dough. You might have to gather the scraps and re-roll the dough to get 6 circles. Drape the circles over the up-side-down jars, pressing the dough to the side of the jar to get a nicely shaped cup. Once all the cups are formed, place the baking sheet in the freezer for 20-30 minutes.
  • Have ready six strips of parchment wide enough to support the pie once it's in the oven and long enough to reach around the circumference of the pie and six lengths of string. Remove the baking sheet of pastry cups from the freezer. Free the pastry from the jars while it is still good and frozen, but put the cups back on the jars so they have some support while you're tying them. Wrap a piece of parchment around the center of each cup and secure it well with string. Take the cups off the jars and place right way up on the baking sheet, which you should now line with parchment. Return cups to freezer briefly.
  • Mix a tablespoon or two of flour into your filling. Have ready a couple tablespoons of butter for dotting on the filling before closing the pies.
  • Take the cups from the freezer and set aside. Preheat oven to 375° F.
  • Roll out the smaller ball of dough on a floured surface and cut out six tops with a 3-inch cookie cutter. Fill the pies, leaving enough room at the top to create a nice edge. Dot each pie with a bit of butter. Place a top on each pie. Seal your pies, using a little water if it seems necessary. Crimp the edges. Poke a hole in the top of each pie (I used the back of a paint brush).
  • Just before they go in the oven brush tops with egg/water mixture. Bake 30-40 minutes, or until crust is golden and filling is bubbling.
Y. said that his friends usually make some godawful stir fry with the hearts and livers of their deer. This being Y.'s deer, he got to choose the menu. I sensed some initial resistance to humble pie, but I think we won them over.

Wednesday, November 11, 2009

Apple Cider

The taste of fresh cider always surprises me. You think you've had good apple juice and then you have a sip of cider straight from the press and you realize you don't know a thing. Now that is apple juice. It's sweet and tart and, being a little bit thick, glides over your tongue in a silky stream of apple essence.
When D. invited me to an apple party, I wasn't quite sure what to expect, but gladly accepted figuring that spending a beautiful fall day outside doing something with apples couldn't be all bad. Having been to parties at D.'s before and having always been unfashionably punctual, I intentionally showed up an hour late, but was still the first to arrive. This meant watching a hungover D. prepare himself a one o'clock breakfast, but also gave me a chance to poke around and take a few pictures.
Shortly after D.'s mom got there we trekked down to the lower pasture to pick apples. They were old, gnarled apple trees bearing small fruit, which were showing a season's wear. They were good apples, though, flavorful and crisp, and the cider press doesn't care about looks.
Each batch of cider tasted slightly different. The one made mostly with the red apples (I'm afraid we didn't know the varieties we were working with) was rich, pleasantly sweet, and quite tart. The yellow apples made a cider too sweet for my taste, with few of the balancing characteristics of the other one. We were especially pleased to see that the cider we pressed from the Hidden Rose apples (sweet, tart, astringent), instead of being golden-brown like most cider, was as pink as--pinker even than the flesh for which the apples are named.
Cider presses are expensive. Apple trees take a long time to grow and mature. Cider is delicious. So when a friend has borrowed a press, has apples to harvest, and asks you to help, just say yes and don't begrudge him his homefries.

Saturday, November 7, 2009

Walnuts

I am of the opinion that perfect fall days--the crisp, clear ones that convince you if hobbits ever came to America they would choose to live in Vermont--should be spent outside. If they can be spent outside in pursuit of a foodstuff, so much the better. Unfortunately, between cooking all morning and working all night, the time I spend outside is often reduced to the seven minutes it takes me to walk to work. It was a pleasure, then, to spend an hour Wednesday morning gathering walnuts in the thicket behind M.'s house.
M. wasn't there, but told Y. he had gathered all the nuts he wanted and to come get the rest before the squirrels did. We followed his directions to the tree, expecting from M.'s description to see nuts littering the ground, but found nothing. At least not right away. I took a few steps toward the stone wall and hiding under some dry, brown leaves were what looked like tennis balls. I immediately heard the voice of HBC saying, "And if Mr. Emerson finds us frivolous, he can go and look for tennis balls. Go and look for tennis balls, Mr. Emerson." After finding the first two walnuts, and confirming with Y. that they actually were what we were looking for, they were suddenly everywhere.
In a little under an hour we gathered four times the nuts that M. thought were still out there. I'm afraid we raided two squirrel caches, possibly dooming two squirrel families, but Y. assured me that squirrels often forget where their hiding places are anyway. If it is any consolation, I promise, in a few weeks when the walnuts have been dried and shelled, to make something delicious with them.

Thursday, November 5, 2009

Quince Brandy

I know I told you it wasn't too early to make up your mincemeat, and it's not. Not if you start giving pies away just after Thanksgiving. But you might want to make more for Christmas and this time you might want to make your mincemeat with quince brandy, which has to sit for at least six weeks, so you'd better hop to.

Quince Brandy

adapted from Nigella Lawson

  • 4-6 quinces
  • 2 litres cheap brandy
  • 4 small cinnamon sticks
  • 4 star anise
  • Rub the fuzz off your quinces with a kitchen towel. Quarter them, without peeling or coring, and place them in a large (one-gallon), wide-mouth jar. Pour the brandy over the fruit, filling the jar. Plop in the spices, close the jar, and leave it for at least six weeks.
I just saw this in Nigella Lawson's How to Be a Domestic Goddess and put it up because I had four quinces languishing in my fridge, so I can't tell you what it tastes like. She says it's "peachily delicious." She says, "The quinces and aromatic spices mellow the brandy, and their fragrances hover around just enough to let you know they're there." I'm inclined to believe her.

Monday, November 2, 2009

Applesauce Quick Bread

I could easily have eaten all three cups of applesauce straight from the baking dish along with the entire pint of crème fraîche, but, fortunately, I didn't. I put it, instead, in jars in the fridge and turned to my cookbooks to decide what to do with it. The Joy of Cooking, that stalwart soul of a cookbook, came through with two recipes, both of which I modified to my particular circumstances. The next morning I baked an applesauce quick bread and an applesauce cake, the quick bread beating out the cake for its place in the spotlight.
This is a moist, substantial, not-too-sweet, and entirely satisfying bread. It uses butter instead of oil, which I like, and the mixture of flours gives it a slight heft without the bread becoming dense. The applesauce, cider, and buttermilk provide ample moisture, the walnuts the right amount of crunch.

Applesauce Quick Bread

adapted from the Joy

  • 1 1/2 cups all-purpose flour
  • 1 1/2 cups white whole wheat flour
  • 1/2 tsp. salt
  • 1 tsp. baking soda
  • 1/4 cup butter
  • 1/2 cup sugar
  • 1 egg
  • zest of one orange
  • 3/4 cup applesauce
  • 1/4 cup apple cider
  • 1 cup buttermilk
  • 1 cup walnut pieces
  • Preheat oven to 350°F. Butter and flour a 9x5-inch loaf pan and set aside.
  • Combine the flours, salt, and baking soda and set aside.
  • In a large bowl, cream the butter and sugar until light and fluffy. Add the egg and beat until well combined. Add the orange zest, applesauce, and apple cider. Mix to combine. Your batter will appear curdled--don't let this bother you. Add the flour mixture and buttermilk alternately, starting and ending with flour. After the last addition of flour mixture, stir until just combined. Fold in the walnuts.
  • Pour batter into prepared loaf pan and bake 1 hour 15 minutes, or until a tester comes out clean. Cool in the pan 10-15 minutes, then turn out onto a cooling rack.
There is not a bad time to eat this bread. It makes a delicious breakfast, a perfect mid-morning snack, a nice something sweet after lunch, just the thing for tea, and satisfies that craving after dinner. Had I not given the second half of the loaf away, I would be eating a slice right now.

Saturday, October 31, 2009

Applesauce

I told you I would make applesauce before the season was over. If I had known it was going to be this good, I would have made it sooner. But then I only read Elizabeth David's "Big Bad Bramleys" article a few days ago, so had I made it sooner I would have made some stovetop affair and it wouldn't have been nearly as tasty. Timing, they say, is everything.
After nine weeks of fall fruit share I was left with several bags in the bottom of my fridge each containing one or two apple orphans. There was a Honeycrisp, a couple of Macouns, a Black Oxford, an Empire, and three Pinovas. Having just read the aforementioned article, I new exactly what to do with them: make apple orphan applesauce.
You might have a hard time getting excited about applesauce. I've been raving at people about it for the past two days and I think they might worry that I spend too much time alone. I know it's not much to look at. I mean, it's applesauce, right? But this is Apple Sauce. With a difference. This method calls for baking peeled, cored, sliced apples in a covered dish without the addition of water or sugar or anything whatsoever until they are tender enough that "to whisk them into a purée is then the work of less than a minute." You then add a lump of butter and a bit of sugar if you want (I didn't). The result is pure apple bliss.

Applesauce

forever indebted to Elizabeth David

  • apples, however many of whatever variety
  • 1 knob salted butter
  • sugar, if desired, to taste
  • Preheat oven to 350°F.
  • Peel, core, and thinly slice apples, as if for apple pie. Arrange slices in a baking dish. Six or seven apples will fill a 9-inch square baking dish and yield approximately 3 cups of apple sauce. Cover dish and and place apples in oven. Bake 30-45 minutes, or until apples are burbling and very soft.
  • Remove from oven and mash apples with a fork. (This should be very easy. The apples should practically mash themselves. If they're putting up a fight, stick 'em back in the oven for a few.) Add the butter and sugar, if using, and mix them in with your fork.
Because the apples stew in only their juices without being diluted by water, the apple flavor is somehow intensified, concentrated, made more apple than apple itself. I found the addition of sugar to be unnecessary--the apples were sweet enough as they were and I didn't want to risk masking any of the apple flavor. Butter makes everything better--it makes the applesauce velvety, creamy. Elizabeth says it "provides the clue to the excellence of this recipe" and she's right.
I used most of my applesauce for baking, but as soon as I was finished mixing in the butter I helped myself to a cupful of the warm sauce, topped it with a bit of crème fraîche, and was transported.

Wednesday, October 28, 2009

Fall Pie Primer, Part Four: Pumpkin Pie

It seems fashionable now to have an aversion to pumpkin pie. All the magazines seem to be offering alternatives to it--take such-and-such or blah-and-dah to your Thanksgiving gathering, a refreshing change from pumpkin pie. Honestly, I don't understand. What could possibly be wrong with silky, spiced, pumpkin custard in a flaky butter crust? And don't give me the evaporated milk answer, because you don't have to use it.
I ran several pumpkin pie trials this week and discovered that there is no reason to use evaporated milk in your pumpkin pie filling. You don't even have to spend hours cooking down your own milk in an attempt to duplicate what comes out of the can. You can simply use a combination of milk and cream instead. You wouldn't think of using canned milk in any other custard, so why in this one? For one pie I took the time to heat the milk and temper the eggs and cook them in a double boiler until the mixture coated the back of the spoon et cetera and so forth, but it was really unnecessary. The one with milk and cream and none of the double boiler hoopla set up just as well. So there you go: no more Carnation! Take that, Libby.

Pumpkin Pie

one 9-inch pie

  • 1/2 recipe pie crust
  • blank
  • 2 cups pumpkin purée from 1 medium-large pie pumpkin
  • 3 eggs
  • 1/2 cup brown sugar
  • 1/2 tsp. salt
  • 1 tsp. cinnamon
  • 1/2 tsp. ginger
  • 1/4 tsp. cloves
  • 1/4 tsp. nutmeg
  • 3/4 cup whole milk
  • 1/2 cup heavy cream
  • Make up the dough, wrap tightly in plastic and refrigerate while you make the filling.
  • Cut pumpkin in half and remove seeds. Cut the halves in half and place in a steamer basket. Steam until tender, about 20 minutes. Scoop out the flesh and place in a blender. Blend until smooth. Drain purée in cheesecloth in a strainer for 10-15 minutes to remove some of the water.
  • Preheat oven to 425°F.
  • Measure out 2 cups of pumpkin purée and return to blender. Add the rest of the ingredients to blender and blend again until smooth.
  • Roll out your dough between sheets of waxed paper into about a 12-inch round, or until you judge it will fit in your pie pan with about an inch of overhang. Press the dough into the pan starting with the bottom and working up the sides so there is no air trapped underneath it. Crimp the edges, folding the dough over on itself to get a nice thick edge.
  • Blend filling for another second, then pour into pie shell. Do this on a piece of counter close to the oven so you don't have far to go with it.
  • Bake at 425°F for 15 minutes, reduce heat to 350°F and bake an additional 45 minutes. The center of the pie should still be jiggly when you take it out of the oven. It will set as it cools. A cracked pie is an overcooked pie. Allow to cool completely before serving.
If you're lucky, you'll have some leftover filling. If you do, I recommend pouring it into a small ramekin, placing the ramekin in a dish of hot water and baking it along side the pie. It might be done a bit sooner than the pie so keep an eye on it. Let it cool, whip up a bit of cream for the top, and call it a treat for the cook (or share it--I did).
I hope at least one pumpkin pie appears in your fall pie rotation. Sure, make such-and-such, bake blah-and-dah, but I'm willing to bet the pumpkin pie disappears first.