Monday, October 18, 2010

Happy Fall

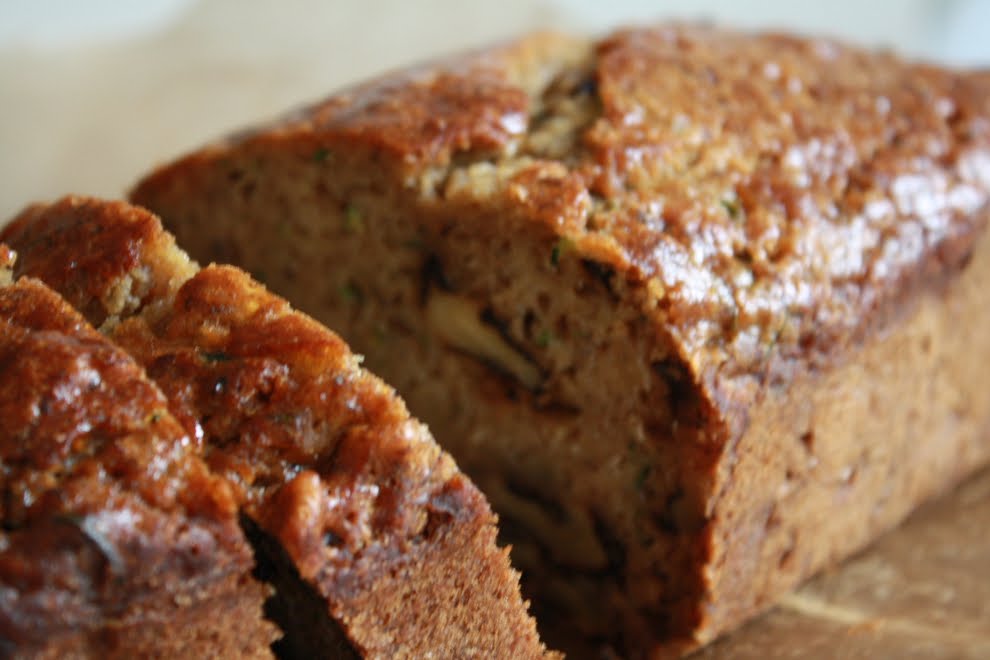
All of a sudden it's fall and I haven't done anything here since high summer. I'm sorry. Really, I am. I could bore you with excuses--a vacation, losing internet service at my house, my laptop going on the fritz, knee surgery (again), moving and then not moving and then living out of cardboard boxes until I actually do move--which I guess I did, but I'll spare you the details.
This pause does, however, have an upside: your Power to the Bauer withdrawal symptoms have probably abated by now, so the disappointment you feel when I announce a hiatus from blogging will hardly register. Yes, I'm afraid I will have to stop for a while. As I mentioned above, I am moving and my new residence is equipped with only a two-burner Coleman stove and lacks running water and although Y. cooked me an amazing nine-course meal the first time I went there and any number of divine meals since, I cannot claim to be as intrepid or innovative a cook as he. It is possible I will regale you with accounts of my adventures with the Ovenette, but I make no promises. It is also possible that I will soon have unlimited access to a state-of-the-art kitchen and will therefore be able to blog to my heart's content, but again I cannot be certain. I can offer only my sincerest apologies for not being there at harvest time to can with you and my regrets for having left anyone in the lurch. I wish you all happy cooking and happier eating and I hope to be back soon.

Monday, August 23, 2010

Zucchini Banana Bread

What would you do if you had staffed bananas getting frost bite in the freezer and a baseball bat of a zucchini you grew threatening to go soft in the crisper? There are, of course, any number of things you could do given these circumstances. As I have an extreme fondness for both banana and zucchini bread, I decided to make zucchini banana bread.
I didn't have a recipe, but after reading five or six recipes for other types of sweet, quick breads, I cobbled together this one. And then doubled it because do you know how many cups of grated zucchini my baseball bat gave me? Six, two of which I had to put in the fridge for use in something else. The recipe, although a confirmed success, could probably use some tweaking--a little less butter, maybe, or a tad a less sugar (because bananas are sweet!).

Zucchini Banana Bread

makes two 9x5-inch loaves

  • 3 cups all-purpose flour
  • 2 1/2 tsp. baking soda
  • 1/2 tsp. baking powder
  • 1 tsp. salt
  • 1/2 tsp. ground cinnamon
  • 1/4 tsp. ground cloves
  • a few gratings of nutmeg
  • 1 cup butter
  • 1 cup sugar
  • 4 eggs
  • 1 1/2 tsp. vanilla
  • 4 bananas, mashed
  • 4 cups grated zucchini
  • 2 cups walnut halves
  • Preheat oven to 350°F. Butter and flour two 9x5-inch bread pans and set aside.
  • Combine the flour, baking soda, baking powder, salt, and spices in a bowl and set aside. Cream the butter and sugar until light and fluffy then add the eggs, one at a time, beating well after each addition. Add the vanilla and banana pulp and mix mell. Gradually add the flour mixture, mixing well after each addition. Stir in the grated zucchini then the walnuts and mix until they are evenly distributed.
  • Pour batter into prepared bread pans and bake for one to one and a quarter hours, or until a skewer inserted into the center of a loaf comes out clean. Allow to cool in the pans for several minutes, then turn out onto wire racks to cool completely.
This bread is good warm out of the oven, though it's best not to cut it hot; it's good the next day at room temperature; but it is especially good sliced and toasted and enjoyed alongside a nice cup of something hot.

Wednesday, August 18, 2010

Neiman Marcus Cookies

I know I should be making something with all the fresh veg from the garden, or even from the farmers' market, but today I decided to face my chocolate chip foe and it turns out I can make chocolate chip cookies after all. I came across the Neiman Marcus Cookie recipe in the back of the WWD Neiman Marcus issue in the midst of my chocolate chip cookie despondency and it has taken me two months to gather the courage to try it.
I'm glad I finally did, because it was a success and has gone a long way in reducing my chocolate chip cookie making anxiety. The ingredients and proportions aren't that much different from those in other choc chip cookie recipes I have tried, except for the addition of instant espresso, but the oven temperature is considerably lower and the cookies are cooked for longer. I think this made all the difference, although it could just as easily have been the weather or the position of the stars or any other number of things over which I have no control.

Neiman Marcus Cookies

adapted from Women's Wear Daily

  • 1 3/4 cups all-purpose flour
  • 1/2 tsp. baking powder
  • 1/2 tsp. baking soda
  • 1/2 tsp. salt
  • 1 1/2 tsp. instant espresso
  • 1/2 cup butter, soft
  • 1 cup light brown sugar
  • 3 Tbs. granulated sugar
  • 1 egg
  • 2 tsp. vanilla
  • 1 1/2 cups chocolate chips
  • Combine the flour, baking powder, baking soda, salt, and instant espresso in a bowl and set aside. Cream the butter and sugars until light and fluffy then add the egg and vanilla and beat well to combine. Gradually add the flour mixture, mixing well after each addition. Add the chocolate chips and stir until they are evenly distributed.
  • Preheat oven to 300°F and refrigerate dough while the oven warms up. Drop generous teaspoonfuls of dough onto a parchment lined baking sheet and bake 17-20 minutes. Remove from oven and let cool for a minute or two before transferring to wire rack to cool completely. Repeat with remaining cookie dough.

Saturday, August 7, 2010

Peach and Pepita Chutney

In Jan Berry's Art of Preserving, she recommends this chutney as an accompaniment to grilled game hen or chicken. I'm sure peach chutney would be delicious with grilled game hen or chicken. But I like chutney with everything. Of course I like to serve chutney with Indian food, but I also like it on cheese sandwiches; on turkey sandwiches; with eggs: scrambled eggs, boiled eggs, egg salad sandwiches; with meats of all kinds.
You really can't go wrong with chutney. Nor can you go wrong with half-priced, local, organic fruit. When I saw the baskets of peach seconds at the farmers' market on Wednesday, my first thought, having just had success with wild blueberry jam, was peach jam. Y. asked me to make chutney instead and I was easily persuaded. The seconds were not so-called for no reason. They were bitten and bored into and already a bit on the mushy side. I thought if they were puréed they would make an excellent base and then I could get a few firmer peaches to cut into chunks. So that's what I did and I would do it again. The pepitas were not in Ms. Berry's recipe, but they add a nice textural element, and she used raisins where I prefer currants, and she used a red chili and I a habanero. So you can see: there's always room for modification.

Peach and Pepita Chutney

With inspiration from Jan Berry

  • 1 1/2 lb. overripe peaches
  • 1/2-3/4 lb. firm ripe peaches
  • 2 1/2 cups brown sugar
  • 1/2 cup currants or raisins
  • 2 generous Tbs. grated ginger
  • 1 onion, finely chopped
  • 2-4 garlic cloves, thinly sliced
  • 1 hot pepper, finely chopped
  • 1 1/4 cups white vinegar
  • 1/2 tsp. salt
  • 1/2-1 cup roasted salted pumpkin seeds
  • Place enough jars to hold 4 to 5 cups of chutney into a large pot along with their corresponding domes and rings. Cover with water and bring to a boil. Turn off heat and let sit in the hot water.
  • Peel and roughly chop the overripe peaches. Place them in a blender with about 1/4 cup of the vinegar and process until smooth. Set aside. Blanch the firmer peaches to make them easier to work with and then peel, pit, and cut into small wedges.
  • Place peach purée, peach wedges and all remaining ingredients except the pumpkin seeds in a nonreactive saucepan over medium heat. Stir until the mixture comes to a boil, then reduce heat and allow chutney to simmer 30-40 minutes. Remove from heat and stir in the pumpkin seeds.
  • Ladle chutney into prepared jars, wipe off the rims, and secure the lids. Re-submerge filled jars in the hot water and boil 10 minutes or so to seal. Remove from the water and allow to cool.

Tuesday, August 3, 2010

Consider the Oyster Mushroom

This is what I have managed to glean about the oyster mushroom in the past 48 hours: One, they're DELICIOUS. They're a shelf mushroom preferring to grow on maple trees and particularly old and feeble maple trees and usually too high up to be easily reached. That last bit might not actually be a preference of the oyster mushroom, but it seems often to be the fact of the matter. They might look within reach when you see them from the car, but when you get out and walk up to the tree, nine times out of ten (although I've only been car-shrooming for oysters once) you'll either have to attach your knife to a pole, and a long one, or you'll have to shimmy up the tree in order to reach the mushrooms. Or watch your intrepid boyfriend do the same. As the case may be. Other options include using a ladder or standing on top of your car. They're also kind of gross to clean, but remember point number one: they're DELICIOUS.
Guests often like to help out in the kitchen and there are many things they can do: wash lettuce; chop veg; assemble a salad, even; open wine; wash dish. If oyster mushrooms should be on the evening's menu and an enthusiastic guest offers to clean them, however, kindly ask him to make you another cocktail instead. It's not that oyster mushrooms are difficult to clean or even that they're so delicate as to require careful handling. No, it's just that they have developed a special relationship with a certain orange and black bug and when the mushrooms are bathed in salt water, which they should be, these bugs are forced out of their hosts and either float to the surface of the water or become lodged in the mushroom's gills, in which case a finger or a knife is required to permanently evict them from their home. A guest would, of course, be able to perform this duty, but after having done so, he may or (more likely) may not want to eat his dinner. So, please, clean your oyster mushrooms yourself and while so doing, if it helps or becomes necessary, remind yourself: they're DELICIOUS.
What makes them so DELICIOUS? Their inimitable mushroomy texture. Their earthy, woodsy flavor. Y. laughed when I said this, but I definitely detected a pleasant mollusk aroma when they were in the pan. Perhaps that is why they do so well sauteed with garlic and onion and simmered in white wine and when that's cooked down doused with heavy cream, cooked down again and served over pasta. Yes, oyster mushrooms are DELICIOUS.
NB: Please do not eat mushrooms you've gathered yourself unless you are absolutely sure they're what you think they are.

Saturday, July 24, 2010

Wild Blueberries

Last summer I discovered mulberries; yesterday I picked my first quart of wild blueberries. A walk around the block brought me to the mulberries; a drive across state lines and a five mile hike was necessary to find these blueberries, but it was well worth it. Wild blueberries are the very essence of blueberry. They're not as fleshy as their cultivated cousins and their seeds are more prominent, but they taste sweeter and bluer and somehow... berry-er.
These berries are probably best enjoyed in the woods: a sweet reward for energy spent, but if you do happen to have a container with you and if you have the self control to put more berries in the container than in your mouth and if you manage not to trip over any roots or rocks on your way down the mountain and spill your hard earned loot and if there are any berries left after the car ride home, you can make a delicious jam out of them.

Wild Blueberry Jam

Adapted from the Pomona's Universal Pectin box

  • 4 cups wild blueberries, mashed
  • 1/4 cup lemon juice
  • 2 tsp. calcium water
  • 1 cup sugar, more or less depending on your taste
  • 2 tsp. pectin powder
  • Cover jars, lids, and rings with water in a large pot and bring to a boil. Turn of heat and let stand in hot water.
  • Place berries and lemon juice in a pot and add calcium water. Mix well. Combine sugar and pectin powder in a separate bowl, mixing thoroughly. Bring the fruit mixture to a boil. Add the sugar-pectin mixture and stir vigorously for 1-2 minutes, until dissolved. Bring back to the boil and remove promptly from heat.
  • Fill jars to 1/4 inch from the top. Wipe rims clean and screw on the 2-piece lids. Put filled jars in boiling water to cover. Boil for 10 minutes. Remove from water and allow to cool, listening for the distinctive popping sound of jars sealing.
When I have made jam in the past, I have used only fruit and sugar and lemon juice, shying away from adding pectin. I liked the simplicity of it. What I didn't like, however, was the vast quantity of sugar required. I felt that I could hardly taste the fruit through the sweetness, so yesterday I heeded a piece of advice I overheard an old lady dispensing two jam-making seasons ago: "Just buy pectin and use the recipe in the box. It works every time." And it did work. And for four cups of fruit I used just one cup of sugar and my jam tastes like the wild blueberries from which it is made.

Wednesday, July 21, 2010

Summer Rolls

This eating from the garden thing is absolutely the way forward. I have a feeling I will never tire of it. Last night the only ingredients of our venison-with-wild-blueberries-fried-squash-blossoms-and-haricots-verts-with-scallions feast that didn't come from Y.'s land were the wild blueberries, which came from an obliging bush on the side of the road, and the egg and flour the blossoms were dipped in before they met their fate in the frying pan. I didn't do quite as well here, but all the non-white ingredients that went into the rolls I picked myself from the garden.
It is more usual to see cilantro or mint in summer rolls, but we don't have mint and the cilantro bolted while I was being overwhelmed elsewhere in the garden. As I was pinching flowers off the basil Monday morning, I picked a branch of leaves for myself off each plant. I could, I suppose, have made yet another pesto dish, but when I saw the anise hyssop in the the raised bed just outside the cabin, it occurred to me that I could use it along with the basil in summer rolls. Instead of lettuce I chose sugar snap and snow peas to provide the crispy green in the rolls and I was pleased to have a purple carrot ready to pull. (It meant I hadn't weeded all the carrots as they came up.) Tofu provided the protein in my rolls, but chicken or shrimp or even hard-boiled or scrambled eggs would be just as good (or better).
The rolling takes a bit of practice, so try not to get frustrated. Put what will be the pretty side on the bottom as you build your roll and remember there is no need to rush.

Summer Rolls with Peanut Dipping Sauce

  • For the rolls:
  • 12 spring roll wrappers
  • 1/2 package rice vermicelli
  • 24 basil leaves
  • 24 large anise hyssop leaves
  • 24 sugar snap peas
  • 24 snow peas
  • 1 carrot, cut attractively
  • 1 block firm tofu
  • blank
  • For the dipping sauce:
  • (From Martha Stewart)
  • 1/2 cup peanut butter
  • 1/2 cup warm water
  • 1/4 cup lime juice (2 limes)
  • 1 Tbs. soy sauce
  • 4 scant tsp. sugar
  • peanuts for garnish
  • To make the rolls: Cut tofu into batons. Chop the carrot any way that appeals to you. Wash (if necessary) and trim the basil and anise hyssop leaves. De-string the sugar snap peas. Cook the rice noodles according to the directions on the packet. Line up your ingredients on a work surface and fill a large shallow dish (pie plate?) with warm water and have ready a damp tea towel to work on. Soak a wrapper in the water for 15-20 seconds. Remove from water and lay flat on the tea towel. Stack your ingredients in the middle of the wrapper, starting and ending with either the basil or anise hyssop, facing the leaves outward. Fold the bottom edge over the stacked ingredients, then fold in the sides, and finally roll the onto the other edge. Set aside and repeat with remaining wrappers.
  • For the sauce: Whisk together the peanut butter and water until smooth. Add the lime juice, soy sauce, and sugar, and mix until well incorporated. Garnish with peanuts and an anise hyssop flower.
I worried (because that's what I do) that the vermicelli would be crunchy or the basil and anise hyssop would compete with each other and/or the peanut sauce or they'd just be bland, but (as usual) my worries were unfounded. I ate two rolls for lunch and they were delicious and extremely refreshing on a hot and humid day. I guess that's why they call them summer rolls.

Wednesday, July 14, 2010

Beets with Their Greens, Scapes, and Chèvre

The garden is starting to produce! We have been eating broccoli rabe for a month now and chard and lettuces and peas and basil and strawberries and now beets too. And these are only the ones I pulled while thinning the bed, that the rest will get bigger. When they do I'll make this dish as I usually do, with layer upon layer of beet rounds topped with chèvre and chives, reserving the greens for something else. For now, though, this is a delicious alternative.

Beets with Their Greens, Chèvre, and Scapes

  • 1 bunch small beets, with greens
  • 1 handful garlic scapes
  • 1 small round fresh chèvre
  • olive oil, salt, pepper
  • Cut the beets from their greens, trim, halve or quarter as necessary to make them all about the same size, and boil them until a fork can slide easily into them. Strain and rinse immediately in cold water. Peel beets by simply rubbing them with your thumb and fingers, under cold water if necessary. Set aside.
  • Cut scapes into manageable lengths and sautée in olive oil for as long as it takes to chop the greens. Add chopped greens to the pan, cover, reduce heat to low and allow to cook, turning occasionally, until both scapes and greens are tender.
  • Transfer greens to an attractive dish, making a bed for your beets. Scatter beets over the bed of greens and top with decent-sized chunks of chèvre (if you crumble it into pieces that are too small you will have all crust and no melt when you put it under the broiler). Drizzle olive oil over the top and season lightly with salt and pepper. Put under the broiler until the cheese is touched with gold.

Thursday, July 8, 2010

A Note on the Importance of Using It All

You already know how I am about separated eggs: the half that isn't called for in one recipe will always get used in another, whether I really need six crème brulées in my fridge or not. You can see now that my use-it-all fanaticism is worse than you thought. Yes, those are grouse feet and yes, I have made them into earrings. And worn them. With pride. I actually find them quite beautiful and believe by making and wearing them I am showing some sort of respect for the animal who was killed and most gratefully eaten.

Grouse Foot Earrings

makes one pair

  • one pair fresh grouse feet
  • salt to cover well
  • Form loops in two pieces of wire, leaving a long end on each. Poke the wires into the ends of each leg until the loops meet the flesh and carefully position each loop in the same orientation. Place your grouse feet in a ziplock bag and pour salt over them until they are well covered. Close bag and set aside.
  • Several months later break them out of the salt and, using a brush you might otherwise use to clean mushrooms, remove any salt that clings to the feet. Remove any remaining feathers or material you find unsightly.
  • Wrap the ankles in wire. Using another two pieces of wire, attach hooks to the loops you made when you put the feet up to cure.
I can recommend these particularly to those who work with the public in a service capacity and wake up feeling their personal bubble needs an extra ounce of reinforcement any given day. And if they fail to provide it, if someone manages to get through anyway, you can always take one out of your ear and see what those little grouse claws are capable of.

Friday, June 18, 2010

Cherry Pielettes

It's odd. I've never liked cherry pie. Perhaps it's more accurate to say that I've never had a cherry pie that I liked. Talking to mom, we came to the conclusion that they're usually too sweet and gooey. Yuck. Nevertheless, when I saw people coming through the checkout with pints of local, organic Hartland cherries last night, I had to have some too. And I bought them with the intention of making little cherry pies.
To avoid the too sweet, too gooey quagmire, I decided to approach my cherry pies as I would an apple pie. I used about half of the amount of sugar called for and omitted the quick-cooking tapioca entirely. Instead, I used a bit of lemon juice, a couple tablespoons of flour, and as I said a fraction of the sugar. These modifications produced the desired effect, the only complaint being that there wasn't quite enough filling. A happy problem and an easy one to fix.

Cherry Pielettes

makes 6 3-inch pies

  • 1 recipe pie crust (you'll have extra)
  • 1 1/2-2 cups cherries, pitted and quartered
  • 1 Tbs. lemon juice
  • very scant 1/2 cup sugar
  • 2 Tbs. flour
  • Make pie dough and refrigerate at least one hour before rolling. Pit and quarter the cherries. Add the lemon juice, sugar, and flour, mix to combine and set aside.
  • Preheat oven to 450°F.
  • Roll out half the dough, leaving the other half in the fridge, and line 6 3-inch tartlette pans. Refrigerate the lined pans while you roll out the other half of the dough. Fill the pie shells with cherries, leaving behind some of the juices that will have formed. Dot the top of each pie with butter. Cut strips of dough with a fluted pastry wheel from the rolled out dough. Weave a lattice on top of the cherry filling and trim the edges. Brush the tops with an egg/cream wash.
  • Bake at 450°F for 7 minutes. Reduce to 350°F and bake an additional 30-35 minutes, until crust is golden and fruit is bubbling.
  • Cool in pans on wire racks for 15-20 minutes. When you feel it is possible, turn pies out of pans and return to racks. Serve warm or at room temperature.

Thursday, June 10, 2010

Chocolate Macarons

I know it's been a long time. Far too long. While I was away I learned a devastating truth: I cannot make chocolate chip cookies. I can manage perfectly flaky croissants. I'm fine with pie crust. I can bake brioche. Biscotti: not a problem. Allow me to make you puff pastry. But good ol' chocolate chip cookies are apparently beyond me. To console myself, and although I always say my next post will be a savory, I got up this morning and made chocolate macarons. And they're divine.
They have a perfect meringue crust giving way to a pleasantly chewy center. The ganache is as ganache should be: rich beyond rich and like silk on the tongue. The points may not have smoothed out as much as I would have liked, but when I opened the oven and saw perfect collars around every macaron, I was elated.
Macarons were once near the top of my baking intimidation list. After two successful attempts, they have fallen off it. I hope you too can experience the euphoria these little cookies can offer when they work.

Chocolate Macarons

Makes 18 2-inch sandwiched macarons

  • For the macarons:
  • 200 g confectioners' sugar
  • 95 g almond flour
  • 40 g cocoa powder
  • 130 g egg whites (about 4), room temp
  • 130 g granulated sugar
  • Blank
  • For the ganache filling:
  • 1/2 recipe basic ganache
  • 1 Tbs. soft butter
  • 1 1/2 Tbs. Cointreau
  • For the macarons: Line several baking sheets with parchment and set aside. Alternately you can line one baking sheet with parchment and set three other sheets of parchment on your work surface. If you find it helpful, which I do, draw circles the diameter you desire your cookies to be on the parchment.
  • Place the confectioners' sugar, almond flour, and cocoa in the bowl of a food processor and process until there are no lumps and the cocoa is evenly distributed. Set aside. Place the egg whites in the bowl of a stand mixer. Using the whisk attachment, beat the whites on low speed until they are frothy. Increase the speed to medium high and when whites start to hold shape, gradually add the granulated sugar. Continue to whip until whites hold stiff peaks. Using a rubber spatula, fold the almond-sugar-cocoa mixture into the whites in two parts until no streaks of white remain.
  • Transfer the batter to a pastry bag fitted with a medium-large plain tip and pipe mounds of batter into the circles drawn on the parchment. Allow to stand for one hour. Half an hour before the first batch goes into the oven, preheat oven to 350°F. Bake for 15 minutes. Transfer immediately to wire racks to cool. Allow the oven to reheat, transfer your second piece of parchment to the baking sheet and bake 15 minutes. Repeat until all the macarons are baked.
  • For the ganache filling: While the cookies are awaiting the oven, make the ganache. After the cream is fully incorporated, add the butter and process for a few seconds. Add the Cointreau and process a few seconds longer. Transfer ganache to a bowl and refrigerate until pipable, stirring occasionally to allow for even cooling and to prevent a skin from forming.
  • To assemble: When the cookies are fully cooled and the ganache is thick enough to pipe, pipe a dollop of ganache onto the bums of half the macarons. Sandwich with the remaining cookies.

Saturday, May 29, 2010

Grapefruit Arak Sorbet

On our first night in Jerusalem, Y.'s cousins took us to Mahane Yehuda, a restaurant sharing both a name and a neighborhood with the shuk. I was introduced to many things that evening, not least of all Israeli negotiation and perseverance: The table our party of five was led to after waiting next to an empty one for 45 minutes was upstairs in a dark corner and set for four. H. was not impressed and she had no qualms about letting the maître d' know as much. She asked why we couldn't be seated at the table downstairs, which had been free since we got there and big enough for our party. The reply was that it was reserved for a party of six. M. and Y. backed H. up saying that the table the maître d' wanted us to sit at wasn't nearly big enough to accommodate us. The reply this time was that it certainly was big enough--they sometimes even sat parties of six at this table. Thus the maître d' sank her own ship and at H.'s suggestion we were led back downstairs to the empty table, which happened to have an excellent view of the open kitchen and the spontaneous speeches and singing and dancing to come, and left the four top to the as-yet-unseen party of six.
But the relevance of our night at Mahane Yehuda to this post is the grapefruit and arak cocktail that was served upon our arrival at the restaurant before the table debacle and well before the restauranteur from Tel Aviv began speechifying and the waiters commenced drinking and the chef put on his fez and started dancing and waving a dish towel over his head to a song whose lyrics loosely translate to, "I want to be out there in the jungle where there is no Rabbi Google." This refreshing citrus-anise cocktail appeared several times during our stay in Israel sometimes with a sprig of mint, sometimes blended with ice, always absolutely delicious. It is at Y.'s suggestion that I turned it into grapefruit arak, although I couldn't find any and had to use ouzo, sorbet, a perfect accompaniment to the unusually hot days we have had this spring and the many we are bound to encounter come summer.

Grapefruit Arak Sorbet

makes one quart

  • 3 cups fresh-squeezed grapefruit juice (about 9 grapefruit)
  • 1/2 cup sugar
  • 1/3 cup water
  • 1/3 to 1/2 cup arak (or ouzo or pernod), chilled
  • Make a simple syrup with the sugar and water by dissolving the sugar in the water and cooking it on medium heat until clear. Add syrup to grapefruit juice and chill until very cold.
  • Freeze grapefruit-syrup mixture in an ice cream maker according to the manufacturer's instructions. After 10-15 minutes slowly add the arak/ouzo/pernod. Continue to freeze until mixture becomes slushy, another 10 minutes or so. Transfer to airtight containers and place in the freezer for several hours.

Friday, May 21, 2010

A Garden

I've never had a garden before and finding myself part steward of Y.'s this year while he fries bigger fish is, frankly, a bit overwhelming. I don't know what I should put where or when or how close together or how deep or with what companion or in how much sun or during which phase of the moon. At least I know I don't have to take it for twice daily walks. Y. assures me that I can do no harm and the important part is just to be out there doing a bit at time and eventually there will be a garden.
Y. always says there is no time for resting on one's laurels and that seems particularly true in gardening. I was proud of the job I did waking the garden up after the winter. Six hours of clearing pathways and pulling dock and grass and who-knows-what-all left beautiful mounds of soil standing out against the woods. And then I didn't do anything for a good two weeks and the weeds came back as weeds will and I thought, "Right, Em, no resting on your laurels."
I should be out there now weeding and turning soil and planting seeds and telling the plants to grow, although they seem to manage that all by themselves. That is the exciting part. I put seeds in the ground, give them some water, and by some miracle a few days later there are little green shoots coming through the dirt. It's exciting and that's before there's even anything to eat.
It is thrilling to see the asparagus coming up (even though I know we aren't allowed to eat it until next year) or to see flowers on the strawberries that weren't there the day before or to look out the window and be able to make out rows of tiny beets and peas or to eat the first radish of the season. I used to think seeing local produce at the farmers' market was fun, and it is, but seeing it in your own back yard is so much better. I'm still afraid I'm doing things all wrong, but with each new shoot I am gaining confidence that I won't ruin the garden and that we might even have food to put up come fall.

Friday, May 14, 2010

Rhubarb Cake

It is with great pleasure that I announce that at long last the local rhubarb est arrivé! Or it did a week or so ago when I wasn't looking. In any case the 'Oregon' sign on the rhubarb basket has been replaced with a sign showing a map of Vermont and a little star indicating the approximate location of Dwight Miller Orchards, just a few miles from where I sit.
There are a thousand things you can do with this pink, tart stalk. You can make compote or cobbler, tarts or pies, a sauce for fish, a filling for danish, jellies or jams... or you could make a rhubarb cake.
I'll be honest: this is not my favorite rhubarb recipe. There's nothing wrong with it really, but I am not a fan of undercooked batter and the high moisture content of the rhubarb prevents the batter around it from cooking completely. Either that or I took the cake out of the oven ten minutes too early, which is entirely possible even though my toothpick came out clean. I do like the texture the cornmeal lends the cake--its slight crunch contrasts well with the softness of the rhubarb. And the flavor is good. The tartness of the rhubarb keeps the cake from being too sweet and there's just enough cinnamon to be noticed but not enough to be overpowering. So, who knows, maybe the problem is me and not the cake and I should try again before pronouncing my verdict.

Rhubarb Cake

adapted from Nigella Lawson

  • 18 oz. rhubarb
  • 1 cup sugar
  • 1 cup flour
  • 1/2 cup plus 2 Tbs. fine cornmeal
  • 1 tsp. baking soda
  • 1/4 tsp. salt
  • 1 tsp. ground cinnamon
  • 2 large eggs
  • 1 tsp. vanilla
  • 1/2 cup butter
  • 1 cup plus 2 Tbs. yoghurt
  • Preheat oven to 350°F. Butter and flour a 9-inch spring form pan and set aside.
  • Clean and trim rhubarb if necessary, then cut into 1/2 inch pieces and place in a medium bowl. Sprinkle 1/3 cup of the sugar over the rhubarb and set aside.
  • In another bowl, combine the flour, cornmeal, soda, salt, and cinnamon. Beat the eggs with the vanilla. In large bowl cream the butter and remaining 2/3 cup sugar. Gradually add the egg mixture to the creamed butter, beating well. Alternately add the flour mixture and yoghurt, mixing just to combine after each addition. Finally, fold in the rhubarb, sugar, and any juices that might be in the bowl.
  • Pour batter into prepared pan and bake about one hour. Cover the top with foil if it starts to get too dark.
  • Allow to cool in the pan for a few minutes and then turn out onto wire racks.

Friday, May 7, 2010

Pizza on the Grill

I understand that when most people make pizza on the grill, they make pizza on the grill. With nothing between the pizza and the grill. You might think that if you're going to put a pizza stone on the grill, you could just as easily bake your pizza in the oven. And you're probably right. But there are two or three reasons that still convince me it's a good idea. Maybe you don't want to deal with the hassle of flipping the crust, but you still want a bit of that smoky, grill flavor. Put a stone on the grill. Say your boyfriend lives in a one-room cabin in the woods and doesn't have an oven and you're still determined to make pizza. Put a stone on the grill. Or if it's the middle of summer and it's a kazillion degrees out and you'd rather not fire the oven up to four-fifty. Put a stone on the grill.

Basic Pizza Dough

Adapted from Marcella Hazan

  • 3/4 tsp. active dry yeast
  • 1/2 cup lukewarm water
  • 1 1/2 cups plus 2 Tbs. bread flour
  • 1 1/2 tsp. olive oil
  • 3/4 tsp. salt
  • cornmeal for dusting the peel
  • Sprinkle yeast over 1/8 cup of the water and set aside for about 10 minutes, or until yeast is dissolved. Once the yeast has dissolved, add 1/2 cup of the flour and mix thoroughly. While still mixing, add the olive oil, salt, another 1/8 cup of the water, and 1/2 cup of the flour. Continue to alternately add the water and flour until a manageable, soft, but not sticky dough forms.
  • Knead dough for 10 minutes until soft and silky. Lightly grease a clean bowl with olive oil. Form the dough into a ball, place it in the bowl, cover, and allow to rise until it has doubled in volume, 2-3 hours.
  • Start heating the grill with the pizza stone on it about 1/2 hour before you're ready to bake.
  • Dust a peel or baking sheet generously with cornmeal. Punch down the dough and form it into a circle with a rolling pin or your hands or by any means that suit you. Place formed dough onto dusted peel or baking sheet. Put the toppings of your choice on the dough, leaving a bit of an edge.
  • If using a gas grill, turn off the fire that is directly below the pizza stone, leaving lit the fires to the sides. Using jerking movements and possibly a spatula, slide your pizza onto the stone. Close the lid and allow to bake about 20 minutes, or until the dough is a light golden brown.
This was my first attempt, naturally, and I learned one very important lesson. Make sure there is no fire directly below the stone once the pizza goes on it. If there is, the bottom is likely to burn. I'm happy to have burned a pizza so you don't have to so long as you get outside and put a stone on the grill.

Thursday, April 29, 2010

Lemon Macarons

If you made the cheesecake below, you might be wondering what to do with all those egg whites and all that leftover lemon curd. Maybe you already made lemon meringue tartlets. If not, you could try making macarons. I should warn you, though: if they work you'll be overcome with baking euphoria, if not... not. You decide whether it's worth the risk.
The first time I attempted to make macarons, it was a macaron massacre. I aged the egg whites like the recipe told me to and heated the syrup to so-many degrees before drizzling it down the side of the bowl while the whites were whipping and folded in the almonds and sugar just so and piped and waited and baked and then... they were lop-sided and hollow and just plain wrong. I was despondent for the rest of the day. This time I felt like I cheated somehow by making them with French meringue instead of Italian, but when I opened the oven and saw the perfectly shiny domes and frothy little collars, I didn't mind quite so much.
I hope your audience is as appreciative as mine was. I took my macarons to work with me and was positively regaled with praise. "They look like little hamburgers," S. said, "but taste like lemon meringue pie!" Another co-worker said, "I don't know what those are, but I want the recipe." Well, here it is.

Lemon Macarons

adapted from The Fundamental Techniques of Classic Pastry Arts

  • 115 g almond flour
  • 200 gconfectioners' sugar, sifted
  • 90 g egg whites, room temp
  • 8 g confectioners' sugar, sifted
  • 1/2 tsp. almond extract
  • lemon curd
  • Line a baking sheet with parchment or a silicone mat and set aside.
  • Place the almond flour and 200 g sugar in a food processor and process for about a minute. Set aside.
  • Place the egg whites in the bowl of a stand mixer fitted with the whisk attachment and beat on low until whites are foamy. Add the sugar and beat on high to the soft peak stage, being careful not to over-whip.
  • Remove bowl from stand and fold in the almond mixture and almond extract using a rubber spatula. Transfer batter to a pastry bag fitted with a medium round tip.
  • Pipe rounds of batter onto the parchment lined baking sheet, leaving enough room between them for the batter to spread slightly. Make the rounds any size you want so long as they're all the same size. If it helps, you can even draw circles on the parchment as guides.
  • Let the uncooked macarons sit for about an hour before baking. They will form a skin, which will help them keep their shape during baking. Preheat the oven to 325°F. Bake for about 10 minutes, or until firm and just beginning to brown around the edges.
  • Immediately transfer macarons to wire racks to cool. Once cool, pipe a mound of lemon curd on half the macarons and sandwich them with the other half, pressing them together to squeeze the filling to the edges.

Tuesday, April 27, 2010

Sour Cream Lemon Curd Glazed Cheesecake

I love lemon curd: lemon curd on toast, lemon curd tarts, lemon curd cream puffs, just a spoonful of lemon curd on a particularly sunless day. Or how about using lemon curd to decorate a cheesecake? I rescued several Meyer lemons from the reduced bin a couple weeks ago and they were still languishing in my fridge last weekend so it was obvious, I had to make lemon curd. And since Y. gave me this box which had once contained cheesecake and was sadly empty, I decided to restore it to its former glory and to return it to him holding cheesecake once more.

Cheesecake with sour cream lemon curd glaze

  • For the lemon curd:
  • 6 Tbs. butter
  • 2 whole eggs
  • 1 egg yolk
  • scant 1/2 cupsugar
  • 1/2 cup lemon juice
  • zest of 1 lemon
  • blank
  • For the crust:
  • 2 cups digestive biscuit or graham cracker crumbs
  • 1/4 cup confectioners' sugar, sifted (optional)
  • 6 Tbs. melted butter
  • blank
  • For the filling:
  • 1 1/4 lbs. cream cheese
  • 1/2 cup sugar
  • 3 whole eggs
  • 3 egg yolks
  • 1 1/2 tsp. vanilla
  • 1 1/2 tsp. lemon juice
  • 1 pinch salt
  • blank
  • For the glaze:
  • 1 1/2 cups sour cream
  • 2 Tbs. sugar
  • 1/2 tsp. vanilla
  • 1 pinch salt
  • lemon curd from above
  • For the lemon curd: Melt butter over medium-low heat in a heavy-bottomed pot. Add sugar and lemon juice and stir until sugar is dissolved. Beat together the eggs and the yolk. While mixing, pour a bit of the butter mixture into the eggs. Strain the egg mixture back into the butter mixture. Return to heat, reduce heat to low, and whisk constantly until curd forms. Pour into a baking dish, lay plastic wrap over the surface, and refrigerate until cold before using.
  • If you are going to bake your cheesecake in a hot water bath, which is recommended but not absolutely necessary, wrap an 8- or 9-inch spring form pan twice in heavy duty aluminum foil. Set aside.
  • For the crust: Combine the cookie crumbs and sugar if using. Add the melted butter and mix with a fork until all the crumbs are wet. Press into the bottom of the wrapped (or not) spring form pan. Refrigerate while you make the filling.
  • Preheat oven to 350°F.
  • For the filling: In a stand mixer fitted with the paddle attachment, mix the cream cheese on low speed until it is smooth. Add the sugar and mix to combine. Add the eggs and yolks one at a time, mixing well after each addition. Add the vanilla, lemon juice, and salt and mix until smooth. Pour filling onto the chilled crust. If using the water bath method, put the cake pan into a roasting pan and pour recently boiling water into the roasting pan until it comes about half way up the cake. Either way, bake for about 50 minutes.
  • Allow cake to cool to room temperature. Heat oven to 400°F.
  • For the glaze: Combine sour cream, sugar, vanilla, and salt and mix until very smooth. Pour over the cooled cake and level with an offset palette knife. Pipe the lemon curd in concentric circles on top of the sour cream mixture. Starting from the center and working outwards, pull a skewer through the circles of lemon curd. Repeat around the cake until you have formed a sunburst. Place in oven for 5 minutes. Remove cake from oven and allow to cool before refrigerating for several hours.
  • Allow cake to stand out of the fridge for a while before serving.
I adapted this recipe from Nigella and the Joy and my own experience. I had always before made lemon curd in a double boiler, but Nigella gave me the courage to do it in a pot directly on the burner. I didn't have a roasting pan large enough to hold my spring form pan, but if you do I highly recommend baking your cake in a hot water bath. Custards, and what is cheesecake if not a very, very thick custard, do appreciate that sort of treatment. Above all, though, don't stress or rush (which might mean making the curd a day or two ahead), and enjoy this creamy confection with people you love.

Tuesday, April 20, 2010

Pâte à Choux

I have long wanted to make a Croquembouche, one of those divine towers of caramel coated cream puffs crowned with spun sugar. Having never before so much as attempted a pâte à choux, I thought that was a good place to start. I chose Paula Peck as my guide and, true to form, she did not let me down. They turned out so well, I'm sorry now I didn't have the forethought to make a crème pâstissière. Next time.
You can use pâte à choux to make cream puffs, of course, or éclairs or profiteroles or a croquembouche or cheese puffs or any number of pastries sweet or savory. I did not put any sugar in my pâte à choux, but I'm sure you could if you want to push your puffs to the sweet side.

Pâte à Choux

adapted from Paula Peck's The Art of Fine Baking

  • 1/2 cup butter
  • 1 cup water
  • 1 cup sifted flour
  • 1/4 tsp. salt
  • 1/2 tsp. sugar (optional)
  • 4 eggs
  • Preheat oven to 375°F. Line baking sheet(s) with parchment or silicone mats and set aside
  • Combine flour, salt, and sugar (if using) and set aside. Put butter and water in a medium saucepan over medium heat. Cook until the butter is melted and the mixture comes to a boil. Reduce heat to low. Add the flour mixture all at once and stir vigorously for 3-5 minutes. The mixture will pull away from the sides of the pan and form a dough.
  • Remove from heat and transfer dough to the bowl of a stand mixer. Using the paddle attachment beat the dough on low speed for about a minute. Increase the speed and add 3 of the eggs one at a time, beating well after each addition. Lightly beat the fourth egg and add gradually to the dough. Beat until the dough is smooth and shiny.
  • Transfer dough to a piping bag fitted with either a round or star tip, depending on the look you're going for, and pipe dough according to what you're going to use it for.
  • Bake until puffs are golden brown and show no signs of moisture, 40-50 minutes for two-inch puffs. Turn the oven off and leave the puffs in the oven for an additional 15 minutes.
It's an odd process, making pâte à choux, but worth its strangeness for the delight of seeing beautifully puffed pastries when you open the oven.