Sunday, April 11, 2010

A Venison Salami Experiment, Part One

Step one: make the sausage--not a difficult process, but one that has taken me five months and approximately five and a half hours to accomplish. The first four months consisted of gathering the necessary starters and salts and sugars and cetera and of thinking that I really should grind the pounds and pounds of venison sitting in a garbage bag in my freezer. And then one day I did grind the pounds and pounds of venison and put them back in the garbage bag and back into the freezer. Another month went by and then today I spent four and a half hours regrinding the meat, grinding the fat, mixing everything together, stuffing said mixture into hog casings and finally tying them with string. The sausages are back in my freezer now awaiting transport to the dehydrator. Hopefully it won't take another month for them to get there.
If you decide to embark on a similar enterprise, let me offer you these small pieces of advise. One, don't do this alone. Second, don't use the KitchenAid meat grinding/sausage stuffing attachments. Yes, they do work, but not particularly well or efficiently. Third and lastly, really, don't do this alone. You'll want the company and the extra hands, promise.

Wednesday, April 7, 2010

Scones

I had my parents over for tea on Sunday. I baked scones and served them with orange marmalade and whipped crème fraîche. There were daffodils on the table and macaroon nests complete with speckled chocolate eggs. It was a lovely event, all in all, except that I was disappointed with the scones I served and the crème fraîche I had made before my trip to Israel had become a little too sour. I've always had a bit of a scone complex the way other people have anxiety about pie crust or curdling custard. I was determined to kick it today and, with the help of The Fundamental Techniques of Classic Pastry Arts, I think I did.
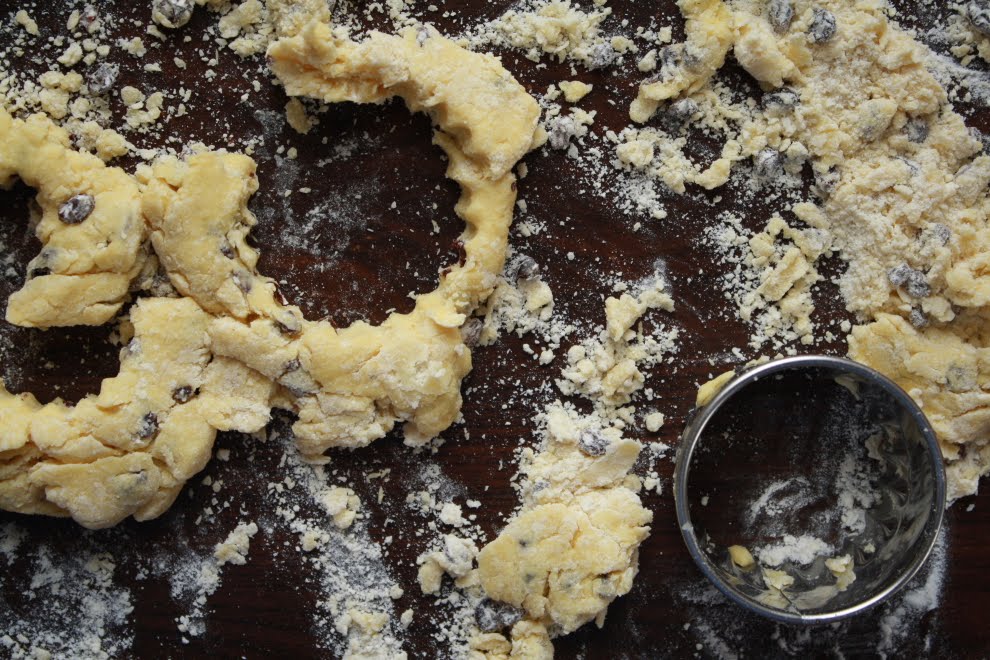
After some initial concern that my dough was too dry, my scones came out flaky, like they're supposed to, and golden and tender and just begging for a dollop of clotted cream.

Currant Scones

adapted from The Fundamental Techniques of Classic Pastry Arts

  • 325 g bread flour
  • 45 g sugar
  • 20 g baking powder
  • pinch salt
  • 110 g butter, cold, cut into pieces
  • 100 g dried currants
  • 1 large egg, room temp.
  • 1 egg yolk, room temp
  • 100-145 mL heavy cream
  • Preheat oven to 350°F. Line a baking sheet with parchment paper or a silicone mat and set aside.
  • Combine the flour, sugar, baking powder, and salt. Drop in the butter and cut it into the flour using a pastry cutter until the mixture forms pea-sized pieces. Avoid over cutting the butter, or your scones will be dense not flaky.
  • Lightly beat together the egg and yolk in a measuring cup. Pour in enough cream to bring the mixture to 200 mL. Stir to combine the eggs and cream. Add the egg mixture to the dry ingredients and mix just until a dough forms.
  • Lightly flour a work surface and turn the dough out onto it. You might have to give the dough a brief knead to bring it together. Lightly pat the dough until it is about an inch thick. Using a round, fluted biscuit cutter, cut out scones and place them on the prepared baking sheet. You can of course cut the scones into the shape of your choice. Brush with either a cream or egg wash and sprinkle with coarse sugar if you like (I happen not to). Bake in the preheated oven 15-25 minutes or until scones are nicely browned on the bottom and edges. Serve immediately.
They say the doom of things like scones in overhandling and they're probably right, but don't be afraid of handling them at all. If your dough is quite dry, as mine was, it might take a knead or two to bring the dough together. Give your dough what it needs and you can't go too far wrong.
I'm glad to have overcome my scone making anxiety. They're supposed to be one of those things you can whip up when someone drops by and offer with a comforting cup of something hot. I might not be a that point yet, but with practice I will be.

Friday, April 2, 2010

Braided Cardamom Loaves

It's just about Easter again and if you don't feel like making hot cross buns for your Sunday brunch, may I suggest you bake up a few braided cardamom loaves. I got the recipe from the current Saveur (thank you, Dad, for the subscription), where they say this bread is eaten with coffee or tea in Finland. There is no reason it cannot be eaten with coffee or tea in the comfort of your own home.
In the comments section of this recipe in the online version of Saveur there is some question about the amount of flour called for. I used the 6 1/2 cups in the recipe and had no problems. I think what it comes down to is properly measuring your flour. You'll want to fluff up your flour, spoon it into the measuring cup until it is slightly overflowing, and then even it off with the back of a knife. Don't, under any circumstances, scoop up the flour with the measuring cup--it will become too compact in the cup and, yes, it'll seem like the recipe calls for way too much flour. This is why I prefer recipes that give quantities by weight. No questions there.
The recipe says it yields two loaves, but I divided the dough farther to make six 8-ounce loaves. If you choose to do the same, check your loaves after 15 minutes and give them a bit more time if needed. My first batch needed 20 minutes and my second batch had just started to get a bit too brown after the same amount of time. In any case, these smaller loaves are ideal for tying up in colored string and giving to your neighbors (or your mother's neighbors, in my case). If you have any leftover I have a feeling they'd make a star bread pudding or scrumptious French toast.

Friday, March 19, 2010

The Shuk

There are a lot of things that make living in Israel, well...difficult. There's the driving for one; the riots; the religious zealots, who mess things up for everyone, but we're getting too political (another thing impossible to avoid in the all too promised land). But then there is Mahane Yehuda aka the shuk, the only place in Israel I visited more than once.
H., Y.'s cousin and our wonderful host during our two-and-a-half week visit to Irael, shops at the shuk every Friday. She has a system and the second I stepped into the raucous market I could see why. She parks, transfers the money she is going to spend from her wallet to an empty pocket in her purse, arms herself with her rolling basket, and then enters the shuk.
While this is not the lovey-dovey farmers' market and your new found Israeli driving skills could come in handy, one does form one's allegiances. H. goes to the same two veggie stalls every week, gets helped by the same man at the cheese shop, who frequently gives her presents and to whom she often brings coffee, gets her fish from only one monger, and while the fish is being prepared has coffee at the same delightful cafe. And they all remember her.
I thought we had a bulk department at the co-op. Having shopped at the shuk, I now know better. Every other stall was stocked with mounds of nuts, dates, raisins, apricots, ten varieties of olives, mountains of spices. Candies and cookies were sold the same way--from giant bins overflowing with product. I would have loved for the phobic among us, those who freak when someone reaches into a bulk bin with his bare hands, to witness the vendor shooing the doves off his almonds or to see the bins of hearts, livers, and gizzards refrigerated, but just barely.
It is a good idea to know what you want before entering the shuk or you might become completely overwhelmed, but if you don't just ask for a taste. A perfect example comes from the cheese shop. Yes, we knew we wanted cheese, but what kind? The cheese man was more than willing to make recommendations and to provide a taste of each. Meanwhile the wine seller behind us was choosing a bottle that matched the cheese. It no doubt helped that we were with H. (protectzia goes a long way in Israel), but showing a genuine interest in food doesn't hurt either. It's common, almost expected, to try a strawberry before buying a whole container, to try a few olives before choosing the ones you're going to walk away with. You certainly won't find any "no grazing" signs.
Another thing you will not find here, or anywhere in Israel as far as I could tell, is a bad cup of coffee. The espresso is made well and served well. At the cafe in the shuk the espresso is served with a tiny glass of seltzer. On our way to the Galilee we stopped at a gas station for coffee and were served at an outdoor table, the coffee in ceramic cups. Baristas across America take note.
Having visited Israel, even for a short time, I realize that I live in paradise and have no room to complain. We could learn a thing or two about the buying and selling of food, however, and how to make a decent cup of coffee.

Wednesday, February 24, 2010

No-Knead Bread

I must be the last person I know to (not) try her hand at no-knead bread. Even my sister, who is busier than six people, manages to keep a sourdough and use it to make no-knead loaves. I have no excuse. Better late than never, right?
It really is as easy as they say, although I think it takes a bit of experience to get exceptional results. For a first go I was very happy. My loaf had a nice crust; the interior had the right shine and a good tooth. It had a minor rising issue though, maybe because the dough was too wet, or I didn't let it proof long enough, or possibly because the recipe calls for instant yeast and I used the same amount of active dry and Andrew Whitley says that you need twice as much active dry as instant and twice as much fresh yeast as active dry. So there's something to try next time.
I'm also curious to try adding some vital wheat gluten flour. I read an article about making whole grain no-knead breads and the author suggested adding 1-2 tsp. vital wheat gluten per cup of flour, but I wonder if it wouldn't help a white loaf too.

No-Knead Bread

adapted from Jim Lahey, Sullivan Street Bakery

  • 3 cups bread flour
  • 1/4 tsp. instant yeast
  • 1 1/4 tsp. salt
  • In a large bowl combine flour, yeast and salt. Add 1 5/8 cups water, and stir until blended; dough will be shaggy and sticky. Cover bowl with plastic wrap. Let dough rest at least 12 hours, preferably about 18, at warm room temperature, about 70 degrees.
  • Dough is ready when its surface is dotted with bubbles. Lightly flour a work surface and place dough on it; sprinkle it with a little more flour and fold it over on itself once or twice. Cover loosely with plastic wrap and let rest about 15 minutes.
  • Using just enough flour to keep dough from sticking to work surface or to your fingers, gently and quickly shape dough into a ball. Generously coat a cotton towel (not terry cloth) with flour, wheat bran or cornmeal; put dough seam side down on towel and dust with more flour, bran or cornmeal. Cover with another cotton towel and let rise for about 2 hours. When it is ready, dough will be more than double in size and will not readily spring back when poked with a finger.
  • At least a half-hour before dough is ready, heat oven to 450 degrees. Put a 6- to 8-quart heavy covered pot (cast iron, enamel, Pyrex or ceramic) in oven as it heats. When dough is ready, carefully remove pot from oven. Slide your hand under towel and turn dough over into pot, seam side up; it may look like a mess, but that is O.K. Shake pan once or twice if dough is unevenly distributed; it will straighten out as it bakes. Cover with lid and bake 30 minutes, then remove lid and bake another 15 to 30 minutes, until loaf is beautifully browned. Cool on a rack.
This is the recipe as it was emailed to me by Y., who knew J. in his Sullivan Street days. I thank them both.

Friday, February 12, 2010

Anise Biscotti

These cookies owe their lives to the death of my car, the birth of baby F., and to my father's continued generosity. To the death of my car because had it not died I would have done the milk bottle toing and froing to the farm myself and not relied on my father to do the same. To baby F. because had he not been there to visit I wouldn't have starting baking early this morning in order not to show up at H.'s empty-handed. And to my father's generosity firstly for doing the toing and froing and secondly for secretly leaving Franco Galli's Il Fornaio Baking Book on my table while I was busy decanting the milk. A lucky set of circumstances leading to a most delicious batch of biscotti.

Anise Biscotti

adapted from The Il Fornaio Baking Book

  • 2 1/2 cups flour
  • 1 tsp. baking powder
  • 1/4 tsp. salt
  • 1 heaping Tbs. anise seeds
  • 1 1/2 cups sliced raw almonds
  • 1/2 cup butter
  • 1 1/4 cups sugar
  • 3 eggs
  • 1/2 tsp. vanilla extract
  • 1/4 tsp. anise extract, if you have it (I didn't)
  • Preheat oven to 375°F. Line two baking sheets with parchment or silicone baking mats.
  • In a medium bowl, combine the flour, baking powder, salt, anise seeds, and sliced almonds.
  • Place the butter and sugar in the bowl of a stand mixer and beat at medium speed until pale and fluffy. Add the eggs one at a time, beating well after each addition then beat in the extract(s). Reduce the speed to low and add the flour mixture a third at a time, again beating after each addition. Continue beating until a smooth dough forms.
  • Turn dough out onto a floured work surface. Divide in four and roll each portion into a log about a foot long and 1 1/2 inches in diameter. Place logs on baking sheets and gently flatten them until they are only about 1/2 inch thick. Leave a few inches between each log to allow for spreading.
  • Bake about 18 minutes, placing the bottom baking sheet on the higher rack and vice versa half way through, until logs are golden brown. Remove from oven and allow logs to cool on the baking sheets until they can be handled, about 10 minutes. Leave the oven on.
  • Transfer logs to a cutting board and, using a bread knife, cut them diagonally into 1/2 inch slices. Arrange the slices on baking sheets with a cut side down and return to oven. Bake until the edges are golden, 8-10 minutes. Transfer to wire racks and allow to cool completely before serving. Store in airtight containers up to 2 weeks.
Why are they most delicious? Because they have a crunch and stand up to dipping, but they don't break your teeth. Because they're delicately anise flavored (being short ingredients can so often be a blessing). Because the almonds give them that inimitable nutty texture and flavor. Because they're small enough to have two without feeling a single pang of guilt.

Thursday, February 11, 2010

Chocolate Ginger Cake with Orange Buttercream

My copy of Joy of Cooking was given to me by my father, who I suspect got it at William James, one of the best used book stores I've ever been in. The previous owner was in the habit of making small exes in pencil next to certain recipes. I wasn't sure if (s)he was simply marking off the recipes (s)he'd tried or if they meant something more than that. There was one such "X" next to the gingerbread recipe. Having baked the gingerbread, with the addition of a little cocoa powder, I can now say that the exes are reserved for those recipes that bear repeating.
It's a simple cake, a quick cake, a seemingly fool-proof cake. It bakes well at any size--I made half a dozen small heart cakes, a 6-inch round cake, and a loaf cake out of one batch of batter. It is moist and fluffy and gingery and if you don't have quite enough honey or molasses it doesn't seem to mind.

Chocolate Ginger Cake with Orange Buttercream

adapted from The Joy of Cooking

  • 1/2 cup butter, melted and allowed to cool
  • 1/2 cup sugar
  • 1 egg
  • 2 1/2 cups pastry flour
  • 1 1/2 tsp. baking soda
  • 3 Tbs. cocoa powder
  • 1 1/2 tsp. ground ginger
  • 1 tsp. cinnamon
  • 1/2 tsp. salt
  • 1/2 cup light molasses
  • 1/2 cup honey
  • 1 cup hot water
  • 1 Tbs. orange zest
  • blank
  • 1/2 cup plus 2 Tbs. soft butter
  • 2 cups powdered sugar
  • 1 Tbs. milk
  • 1/2 tsp. orange extract
  • Preheat oven to 350°F. Butter and flour the pans you intend to use and set aside (the recipe was intended for a 9 x 9 x 2-inch pan).
  • In a large bowl combine the melted butter, sugar, and egg and beat well.
  • Sift the flour into a medium bowl and add to it the baking soda, cocoa powder, ginger, cinnamon, and salt. Mix to combine.
  • In a quart measuring pitcher, combine the molasses, honey, hot water, and zest.
  • Add the flour mixture and honey/molasses mixture alternately to the butter mixture blending well after each addition.
  • Pour batter into prepared pan(s) and bake until a toothpick inserted into the center comes out clean. If baking all the batter in one pan this will take about an hour. Allow to cool slightly in the pan and, when you see the edges of the cake shrinking away from the pan, turn out onto wire racks to cool completely.
  • For the buttercream: place all ingredients into the bowl of a stand mixer and beat with the paddle attachment until pale and spreadable.
Since I didn't have as much honey or molasses as the recipe called for, my cake turned out pleasantly not too sweet. The butter cream, then, wasn't gold on the lily, but a nice contrast. I can also see serving this cake un-iced, warmed, with a generous dollop of whipped cream.